
Side Dishes
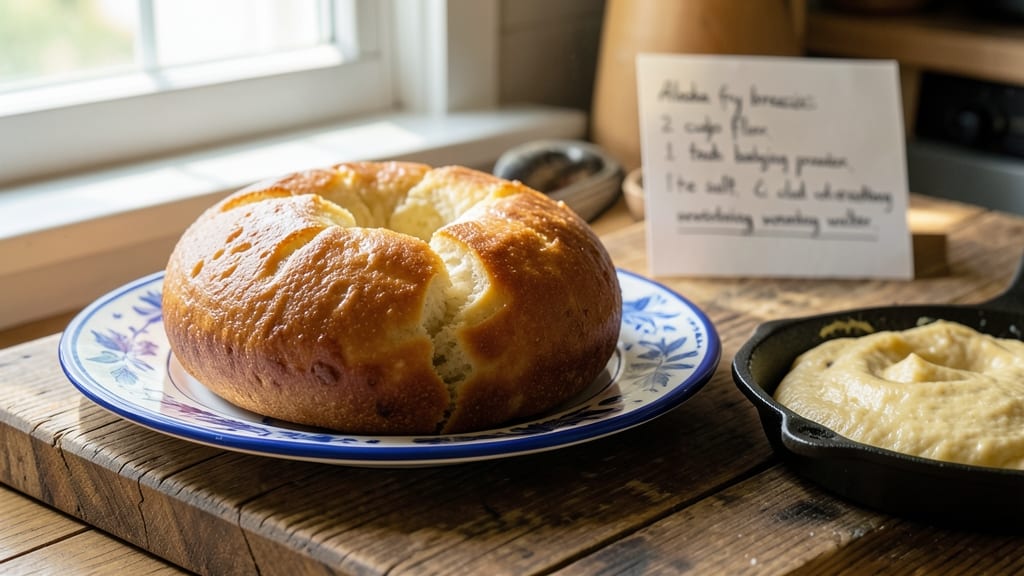
This Alaska Native fry bread recipe brings warmth and tradition to your kitchen with its signature flaky layers and golden crust. 🌟 Born from resilience and cultural pride, this dish transforms simple ingredients—flour, fat, water, and salt—into something extraordinary.
The secret lies in the dough's resting time and perfect frying temperature, creating a texture that's crispy outside and tender within.
What makes this fry bread special is its versatility—it's a canvas for both sweet and savory flavors. Whether you're serving it with honey, jam, or chili, each bite carries a piece of Alaska Native heritage.
The dough is simple to mix, but the magic happens in the frying, where the bread puffs up into golden, airy perfection. It's a dish that connects generations and brings people together.
By the time you're done, you'll have a stack of golden-brown fry bread that's impossible to resist. The aroma alone fills the kitchen with comfort, and the first bite delivers that satisfying crunch and soft center.
This recipe isn't just about food; it's about preserving a tradition and creating memories. Let's get started on making this cultural staple.
Perfect for family gatherings, potlucks, or a cozy night in, this fry bread pairs beautifully with a variety of toppings. From classic sweet spreads to hearty savory chili, the possibilities are endless.
The key is frying the bread just right—hot enough to get crispy edges but gentle enough to keep it tender inside. Here's how to achieve that perfect balance.
Ingredients for alaska fry bread
Four simple ingredients transform into golden, flaky fry bread with cultural heart.
| Ingredient | Amount | Notes |
|---|---|---|
| All-Purpose Flour 🌾 | 4 cups | Sifted for flaky texture |
| Baking Powder 🍞 | 2 tsp | Ensures lightness |
| Salt 🧂 | 1 tsp | Kosher or sea salt |
| Lard or Vegetable Shortening 🧈 | 1 cup | Traditional lard preferred |
| Warm Water 💧 | 1 ½ cups | 110°F for ideal dough |
| Vegetable Oil 🫒 | 2 cups | For deep frying |
| Honey or Maple Syrup 🍯 | ½ cup | Optional topping |
| Powdered Sugar 🍚 | ¼ cup | Optional topping |
| Chili Powder 🌶️ | ½ tsp | Optional savory topping |
The lard is non-negotiable for that authentic, flaky texture—Costco or your local butcher usually have it in bulk. If you can't find lard, vegetable shortening works in a pinch (though purists will notice the difference). The warm water is key—too cold and the dough won’t activate properly. For the flour, King Arthur or Bob’s Red Mill work beautifully, but any all-purpose will do. Sift the flour and baking powder together to avoid lumps, which keeps those signature layers light and airy. And trust me, measure the salt carefully—too much can make the bread tough.
No lard? Shortening or even butter (melted) gets you close, though the flavor won’t be as rich. Running short on baking powder? Self-rising flour can substitute at a 1:1 ratio, but skip the extra salt. The vegetable oil for frying should be peanut or canola—they handle high heat without burning. For toppings, honey from local markets adds that extra touch of authenticity, but maple syrup is a great backup. Want to keep it savory? A pinch of chili powder or even crumbled bacon bits (if you’re not keeping it strictly traditional) turns this into a hearty snack.
This dough keeps 24 hours in the fridge, wrapped tightly in plastic—perfect for prepping ahead. For frying, 350°F oil is ideal, and a deep pot or Dutch oven gives you the best rise. Fry in batches—don’t overcrowd the pan! Leftovers? Freeze between parchment paper for up to 3 months. Reheat in a 350°F oven for 5-10 minutes until crispy again. Pro tip: Store in an airtight container to keep them soft inside and crispy out.
Why You'll Love This Recipe
- Five-Ingredient Magic: The pantry already has these—flour, baking powder, salt, shortening, and water. That’s it. No fancy substitutions, no last-minute grocery runs. Just mix, fry, and watch that golden puff happen every time.
- Crispy-Creamy Payoff: The secret’s in the lard (or shortening) and that quick fry—crispy outside, pillowy inside. Honestly, the first bite makes you question why you ever ate store-bought frozen bread.
- Breakfast to Dessert: Slather it with jam for a kid-friendly snack, top it with honey butter for brunch, or dust it with powdered sugar for a late-night treat. My kids beg for it at all hours—no guilt, just joy.
- Budget-Friendly Leftovers: A single batch stretches for days. Freeze extras and reheat in a skillet when you’re too tired to cook. Between us, this is my go-to when I’ve got hungry mouths to feed and no time to fuss.
Step-by-step instructions for Alaska Native fry bread
Here's how to make the iconic fry bread with perfect flaky layers and golden-brown crust.
👨🍳 Step 1: Mix Dry Ingredients for Flaky Texture
In a large bowl, whisk together the 4 cups all-purpose flour, 2 teaspoons baking powder, and 1 teaspoon salt. I like to use a whisk for this step—it aerates the flour and creates pockets for that signature flaky texture. Sift the flour mixture into a separate large bowl to break up any lumps. This ensures your dough will be light and tender rather than dense.
Here's the thing—don't skip the sifting. Those lumps can lead to uneven cooking and tough spots in your bread. I've made this mistake before, and trust me, you'll notice the difference when you bite into properly sifted fry bread versus unsifted.
🍳 Step 2: Cut in the Shortening for Perfect Layers
Add the 1 cup lard or vegetable shortening to the sifted flour mixture. Using a pastry cutter or your fingers, work the shortening into the flour until it resembles coarse crumbs with pea-sized pieces still visible. This is crucial—overworking the mixture will develop gluten and make your bread tough instead of flaky.
I press down gently on the mixture as I cut in the shortening, rotating the bowl occasionally. You're looking for a texture similar to wet sand—when you press your fingers together, the mixture should hold its shape but still show some dry flour. This ensures your bread will have those beautiful layers when fried.
👨🍳 Step 3: Add Warm Water for Ideal Dough
Gradually add the 1.5 cups warm water (about 110°F) to the flour mixture while stirring with a wooden spoon. Mix just until the dough comes together—it should be slightly sticky but not wet. If it's too dry, add 1 tablespoon water at a time until it forms a soft dough that holds together when pressed.
The water temperature matters here. Too cold and your bread won't rise properly; too hot and you'll kill the baking powder's leavening power. I like to test the water temperature with my finger—it should feel warm but not hot enough to make you wince. Once combined, let the dough rest for 10 minutes while you prepare your frying setup.
🔥 Step 4: Fry in Small Batches for Golden Perfection
Heat 2 cups vegetable oil in a deep skillet or Dutch oven to 350°F. You'll want about 2 inches of oil—enough to fully submerge the bread without overflowing. Use a deep-fry thermometer to monitor the temperature carefully; it should stay steady at 350°F throughout frying.
Working in batches, carefully drop 2-tablespoon portions of dough into the hot oil. I use a spoon to gently flatten each piece into a 3-inch round before it hits the oil—this helps prevent them from puffing up too much. Fry for 2-3 minutes per side until deep golden brown all over. You'll know they're done when they float to the surface and maintain their shape.
🍽️ Step 5: Serve Warm with Traditional Toppings
Transfer the fried bread to a paper towel-lined plate to drain excess oil. Serve immediately while still warm and crispy. For that authentic Alaska Native touch, dust with a mix of 0.25 cup powdered sugar and 0.5 teaspoon chili powder, or drizzle with 0.5 cup honey or maple syrup. The contrast of sweet and savory is what makes this dish so special.
Here's where it gets fun—fry bread is incredibly versatile. You can serve it plain, with honey, jam, or even as a base for breakfast burritos. The key is serving it right away when it's at its crispiest. Each piece should have those beautiful flaky layers inside and a golden, slightly crispy exterior that gives way to a soft center.
Pro Tips For Making Alaska Fry Bread
- MEASURE THE LARD FIRST: Scoop that shortening straight from the tub without packing it down—tightly packed fat throws off the ratio, and suddenly your dough’s too stiff or greasy. Use a spoon to level it off, then melt it just until it’s soft, not liquid. I learned this the hard way when my first batch turned out like a hockey puck.
- LET THE DOUGH REST: Mix the dough, then cover it and walk away for 10 minutes. No, you don’t have to wait forever—just long enough for the flour to relax and the baking powder to start working. Skipping this makes the bread dense; I used to rush it and wondered why my fry bread tasted like a sad biscuit.
- FRIZZ IT TWICE: Fry each piece once to cook through, then flip and fry a second time until golden. The first side should be almost done before flipping—this guarantees even browning and a crispy exterior. I was skeptical until I tried it; now I refuse to serve anything less.
- USE WARM WATER, NOT HOT: Warm water (about 100°F) activates the baking powder without killing the yeast-like flavor in the flour. Hot water makes the dough gummy and tough—sounds weird, but it works. Test it by dipping your finger in; it should feel like bathwater, not scalding.
Serving suggestions for this recipe
Sweet Toppings
Drizzle warm fry bread with honey or maple syrup straight from the pan—this is a classic Alaska Native touch. I like to use local honey when possible, but Wildflower honey from the grocery store works perfectly.
For extra decadence, sprinkle with powdered sugar or a pinch of cinnamon while still hot. The contrast of warm bread with cool, sweet syrup is pure comfort. 🍯
Savory Chili Pairing
Serve fry bread with homemade chili for a hearty meal that feels like a hug. I recommend a beef and bean chili with smoky spices, or a lighter turkey chili for a healthier twist.
The bread soaks up the flavors beautifully—just tear it into pieces and let everyone build their own bowls. For extra authenticity, add a sprinkle of chili powder or crumbled bacon on top.
Breakfast Burrito Style
Turn fry bread into a breakfast burrito by filling it with scrambled eggs, crumbled sausage, and sautéed onions. Wrap it tightly in a paper towel while warm to keep it crispy. This is a family favorite in Alaska—great for feeding a crowd or meal prepping.
Add a side of salsa or avocado slices for freshness. The key is keeping the bread warm while assembling so it doesn’t get soggy.
Dessert Version
For a sweet treat, dust fry bread with powdered sugar and serve with warm apple butter or peanut butter. I sometimes add a dollop of whipped cream for extra indulgence.
This dessert-style fry bread is a hit at gatherings—it’s simple, satisfying, and feels special. Store-bought toppings like strawberry jam or caramel sauce also work in a pinch.
Cultural Serving Style
In traditional Alaska Native gatherings, fry bread is often served family-style on a large platter with toppings in small bowls. This encourages sharing and conversation—just how it should be. I like to arrange the bread in a circular pattern with toppings in the center, so everyone can customize their bites.
The communal aspect makes it more than just food; it’s a way to connect with heritage. 💛
Nutrition facts
Frequently asked questions
Can I substitute shortening for lard in this recipe?
Yes, you can use vegetable shortening as a 1:1 substitute for lard. While traditional recipes call for lard, shortening works well for that classic flaky texture. For extra authenticity, some cooks use a mix of both. Just remember, the fat content is what creates those signature layers in your fry bread.
Why is my fry bread not flaky?
Flaky texture comes from proper mixing and frying technique. Make sure you're cutting the shortening into the flour until it resembles coarse crumbs, not a paste. Also, fry at 350°F in small batches—overcrowding the pan lowers the oil temperature and prevents proper layer formation. Let the dough rest for 10 minutes before frying too!
How do I store leftover fry bread?
Store in an airtight container at room temperature for 2-3 days to maintain crispiness. For longer storage, freeze between parchment paper for up to 3 months. To reheat, warm in a 350°F oven for 5-10 minutes until crispy again. Never microwave—it makes the bread soggy!
What's the best way to serve fry bread at gatherings?
Serve family-style on a large platter with toppings in small bowls. Traditional Alaska Native gatherings often arrange bread in a circle with honey, jam, chili, and powdered sugar in the center. This encourages sharing and customization—each person can build their perfect bite!
Can I make fry bread ahead of time?
The dough keeps in the fridge for 24 hours wrapped tightly. For best results, fry fresh when ready to serve. If making ahead, store cooked bread in an airtight container and reheat in the oven. The key is keeping it crispy—never store in the fridge longer than 3 days without reheating.