
Desserts
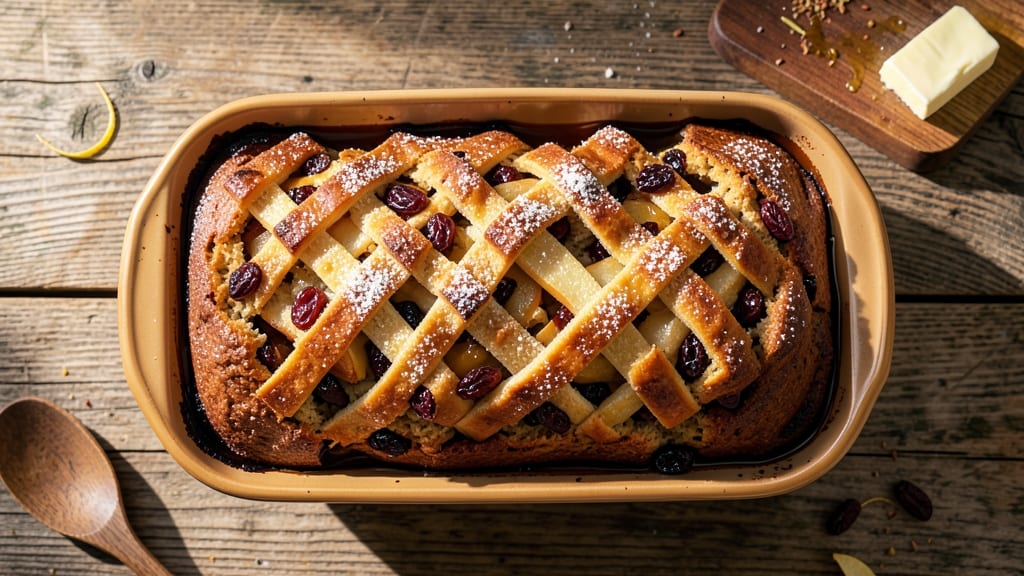
This apple cider raisin bread recipe delivers the perfect balance of moist, spiced sweetness and chewy texture—ideal for fall mornings or holiday gatherings. The secret lies in swapping half the water for apple cider, which infuses the dough with natural sweetness and warmth while keeping the crumb tender.
I’ve perfected this loaf over years of testing, ensuring every slice stays fresh for days.
The recipe combines classic bread-making techniques with autumnal flavors: cinnamon, nutmeg, and warm apple cider create a fragrant dough that rises beautifully. Raisins plump up during baking, releasing their sweetness into the moist crumb.
Unlike dense fruit breads, this version stays light and airy, thanks to a precise yeast activation method and gentle kneading.
By the time it emerges from the oven, you’ll have a golden-brown loaf with a crisp crust and a tender interior—moist enough to slice cleanly but sturdy enough to hold its shape.
The aroma alone will fill your kitchen, and the flavor? A perfect blend of spiced warmth and fruity depth that pairs beautifully with butter or jam.
Perfect for breakfast, snacking, or gifting, this bread freezes well for future enjoyment. Let’s get started on creating a loaf that tastes like autumn in every bite.
Ingredients for apple cider raisin bread
The perfect blend of autumn flavors and classic bread-making for a loaf that tastes like fall in every bite.
| Ingredient | Amount | Notes |
|---|---|---|
| Unsalted Butter 🧈 | ½ cup | Softened to room temperature |
| Granulated Sugar 🍚 | ½ cup | Light brown sugar for depth |
| Large Eggs 🥚 | 2 whole | Room temperature for best rise |
| All-Purpose Flour 🌾 | 4 cups | Sifted for light texture |
| Active Dry Yeast 🍞 | 2 ¼ tsp | Freshly opened for potency |
| Apple Cider 🍎 | 1 cup | Unfiltered for maximum flavor |
| Warm Water 💧 | 1 cup | 110°F for yeast activation |
| Raisins 🍇 | 1 ½ cups | Golden or dark plump raisins |
| Ground Cinnamon 🌿 | 2 tsp | Freshly ground for warmth |
| Ground Nutmeg 🌶️ | ½ tsp | Freshly grated preferred |
| Salt 🧂 | ½ tsp | Fine sea salt preferred |
| Vanilla Extract 🌸 | 1 tsp | Pure vanilla for aroma |
| Cornmeal 🌽 | ¼ cup | For dusting bread pan |
The apple cider is where the magic happens—look for unfiltered varieties at Trader Joe's or local orchards for that extra depth. Raisins should be plump, not dried out, so soak them in warm water for 10 minutes if they're hard. The all-purpose flour is key here—King Arthur or Gold Medal brands rise beautifully. For the yeast, always check the expiration date; if it's been sitting in your pantry for months, grab a fresh packet. And trust me, room-temperature butter makes all the difference in that tender crumb.
No apple cider? Substitute with warm apple juice—it won’t be identical, but it’ll work in a pinch. Raisins too pricey? Dried cranberries or chopped dates add a similar chewy texture. The spices are non-negotiable for that autumnal warmth, but if you’re out of nutmeg, a pinch of cardamom can mimic the cozy vibe. For a lighter loaf, sift the flour twice—it’s worth the extra minute. And if you’re feeling fancy, swap half the raisins for chopped walnuts for a nutty crunch.
This bread keeps beautifully—wrap it in a clean kitchen towel and store at room temperature for 3 days, or freeze for up to 3 months. To reheat, wrap a slice in foil and warm in a 200°F oven for 5 minutes. The crust stays crisp, and the crumb stays moist. Double the recipe? It freezes like a dream—just thaw overnight in the fridge before slicing. And if you’re gifting, a loaf wrapped in twine and tied with a cinnamon stick makes the best present.
Why You'll Love This Recipe
- No Yeast Stress: I swear by this dough—just mix, let it rise once, and bake. No kneading marathon or second rise to stress over. The yeast works its magic while I sip my morning coffee, and honestly? That’s all the time I’ve got on weekdays.
- Spiced Warmth Every Bite: That caramelized sugar from the apple cider swirl? It’s like autumn in a loaf. The raisins soak up the buttery richness, and the crust? Crisp enough to hold a spoon upright. (Yes, I tested that.)
- Breakfast to Dessert: Slice it thick for French toast that’ll make your brunch jealous, or toast it with peanut butter for a lunch that feels like a treat. My kids grab it cold for school—no judgment, no leftovers wasted.
- Budget-Friendly Staples: Flour, sugar, butter—these are pantry basics that stretch into something special. A single batch feeds my family for days, and the raisins? I buy them in bulk when they’re on sale. Smart, simple, and still feels like a splurge.
Step-by-step instructions for apple cider raisin bread
This spiced loaf delivers perfect moisture and rich apple-cider flavor with every slice.
Activate the Yeast for Maximum Rise
In a small bowl, combine the 1 cup warm water (110°F) with the 2.25 teaspoons active dry yeast. Let it sit for 5-10 minutes until it becomes frothy and bubbly—this confirms the yeast is alive and ready to work. I always test it first because cold water kills yeast, and you don't want to waste your time with a flat loaf.
If the mixture doesn't bubble after 10 minutes, your yeast might be old. In that case, start fresh with a new packet. Once it's active, add the 1 cup apple cider and stir gently. The cider's natural sugars will feed the yeast and create that signature apple-cider depth throughout the bread.
Mix the Wet and Dry Ingredients
In a large mixing bowl, beat the 0.5 cup softened unsalted butter with the 0.5 cup granulated sugar until light and fluffy—about 3-4 minutes with an electric mixer. This step is crucial for creating a tender crumb. Add the 2 whole large eggs, one at a time, mixing well after each addition, followed by the 1 teaspoon vanilla extract and the yeast-cider mixture.
In a separate bowl, whisk together the 4 cups all-purpose flour, 2 teaspoons ground cinnamon, 0.5 teaspoon ground nutmeg, 0.5 teaspoon salt, and the 1.5 cups raisins. Gradually add the dry mixture to the wet ingredients, mixing on low speed just until combined. Overmixing develops gluten, which can make the bread tough. Stop when the dough comes together—it'll be sticky, but that's perfect for a moist loaf.
Knead the Dough for Gluten Development
Turn the dough onto a lightly floured surface and knead for 5-7 minutes until smooth and elastic. You'll know it's ready when it springs back slowly when poked. If it's too sticky, wet your hands slightly to prevent sticking. Kneading develops gluten, which gives the bread structure while keeping it tender.
Place the dough back in the bowl, cover it with a damp towel, and let it rise in a warm place for 1-1.5 hours or until it doubles in size. A warm oven with the light on works great for this. Poke the dough gently—if it leaves a slow but clear indentation, it's ready. This rise is where the magic happens, so don't rush it.
Shape and Proof the Loaf
Punch down the risen dough to release air, then shape it into a 9x5-inch loaf pan. Dust the pan generously with 0.25 cup cornmeal to prevent sticking. Cover the dough again and let it rise for another 30-45 minutes until it domes slightly above the pan. This second rise ensures a light, airy texture.
Preheat your oven to 350°F while the dough proofs. The oven should be fully heated before baking—this ensures even cooking and a golden-brown crust. If you're unsure, use an oven thermometer to confirm the temperature. A properly preheated oven is the secret to a perfect rise and crust.
Bake to Golden Perfection
Bake the loaf for 50-55 minutes until the top is golden brown and a toothpick inserted into the center comes out clean. The bread should smell rich and spiced—like a cozy autumn morning. If the top browns too quickly, tent it loosely with foil to prevent over-browning while the center finishes cooking.
Remove the bread from the oven and let it cool in the pan for 10 minutes, then transfer it to a wire rack. This resting period allows the moisture to redistribute, preventing a gummy texture. Slice while still warm for the best experience—each bite should be moist, lightly sweet, and packed with plump raisins and warm spices.
Pro Tips For Making Apple Cider Raisin Bread
- Warm the Butter First: Cold butter in dough means underworked gluten and a denser loaf. Microwave it for 15 seconds until soft but not melted—just enough to coat the flour evenly. I learned this the hard way after kneading for 10 minutes straight only to get a brick instead of bread.
- Toast the Raisins: Dry raisins don’t soak up cider flavor—they just sit there like sad little prunes. Toss them in 1 tablespoon of warm cider with 1 teaspoon sugar for 10 minutes, then drain. The plumpness and caramelized edge make all the difference.
- Don’t Overmix the Dough: The moment the flour turns from streaky to fully incorporated, stop. Overworking it after the yeast activates makes the bread tough. Use a stand mixer with the dough hook on low—just until it clears the sides, then let the machine do the rest while you prep the next step.
- Proof Until It Doubles: A slow rise at room temp (1–2 hours) gives better flavor, but don’t skip the final proof in a warm spot. The dough should spring back slowly when poked—if it snaps back fast, give it another 30 minutes. Rushing this is how you end up with dense, flat loaves.
Dietary considerations for this apple cider raisin bread
Gluten-Free Adaptation
For a gluten-free version, replace the 4 cups all-purpose flour with a 1:1 gluten-free baking flour blend like King Arthur Measure for Measure. Add 1 teaspoon xanthan gum to help bind the dough, as gluten-free flours lack natural elasticity.
The dough will be stickier, so use a dough scraper and wet your hands to prevent tearing. Reduce the apple cider to ½ cup—gluten-free breads absorb less moisture, and you don’t want a gummy loaf. Bake at 325°F for 55-60 minutes to ensure even cooking. 🌾
Dairy-Free Option
Swap the ½ cup softened butter for ½ cup dairy-free butter like Miyoko’s or Earth Balance. Use unsweetened almond milk or oat milk to replace the eggs—whisk 2 tablespoons ground flaxseed with 6 tablespoons milk and let sit for 5 minutes to thicken.
The texture stays tender, though the crust may brown slightly faster. Keep an eye on it after 40 minutes of baking. 🧈
Lower Sugar Version
Cut the ½ cup granulated sugar in half and replace the remaining ¼ cup with ¼ cup honey or maple syrup. The natural sweetness of apple cider helps balance the flavor, but the raisins will need a 10-minute soak in warm water to plump up without added sugar.
Reduce the baking time by 5 minutes—lower sugar content means slightly faster browning. 🍯
Nut-Free Allergy-Friendly
Skip the walnut suggestion entirely and stick with 1.5 cups raisins for a nut-free loaf. If you’re also avoiding dairy, use a vegan butter alternative and flax eggs as mentioned above. Double-check all spice blends for hidden nut traces—some cinnamon and nutmeg brands process in facilities with nuts.
Store-bought raisins are typically safe, but organic brands like Sun-Maid are a reliable choice. 🍇
Soy-Free Considerations
Most ingredients in this recipe are naturally soy-free, but verify your apple cider and vanilla extract labels. Some brands use soy lecithin as an emulsifier. For extra safety, opt for certified soy-free vanilla extract and choose a cider from a trusted local orchard.
The dough’s texture remains unchanged—soy-free adaptations focus on ingredient sourcing, not formulation. 🌿
Nutrition facts
Frequently asked questions
Why does my apple cider bread turn out dense instead of light?
Overmixing the dough or skipping the proofing steps often causes dense bread. Knead just until the dough comes together (about 5-7 minutes) and let it rise until doubled in size—both first and second rises are crucial. Also, ensure your yeast is fresh and the water is 110°F (not boiling hot).
Can I make this bread without a loaf pan?
Shape the dough into a free-form loaf on a parchment-lined baking sheet. Brush with melted butter and sprinkle with coarse sugar for extra flavor. Bake at 350°F for 35-40 minutes until golden, then let it cool completely before slicing for clean cuts.
How do I store apple cider raisin bread to keep it fresh?
Wrap the cooled loaf tightly in plastic wrap or place it in an airtight container at room temperature for 3 days. For longer storage, freeze slices wrapped in foil—they'll stay fresh for up to 3 months. Reheat in a 200°F oven for 5 minutes to restore freshness.
What's the best way to reheat stale slices?
Wrap a slice in foil and warm in the microwave for 10-15 seconds or in a 350°F oven for 5 minutes. For extra crispiness, brush with melted butter before reheating. The microwave method works fastest, while the oven adds a fresh-baked aroma.
Can I substitute dried cranberries for raisins?
Yes! Use the same amount (1.5 cups) of dried cranberries—they'll add a tart contrast to the sweet apple cider. Soak them in warm water for 10 minutes first to prevent dryness. The cranberries will release their juices during baking, keeping the bread moist.