
Desserts
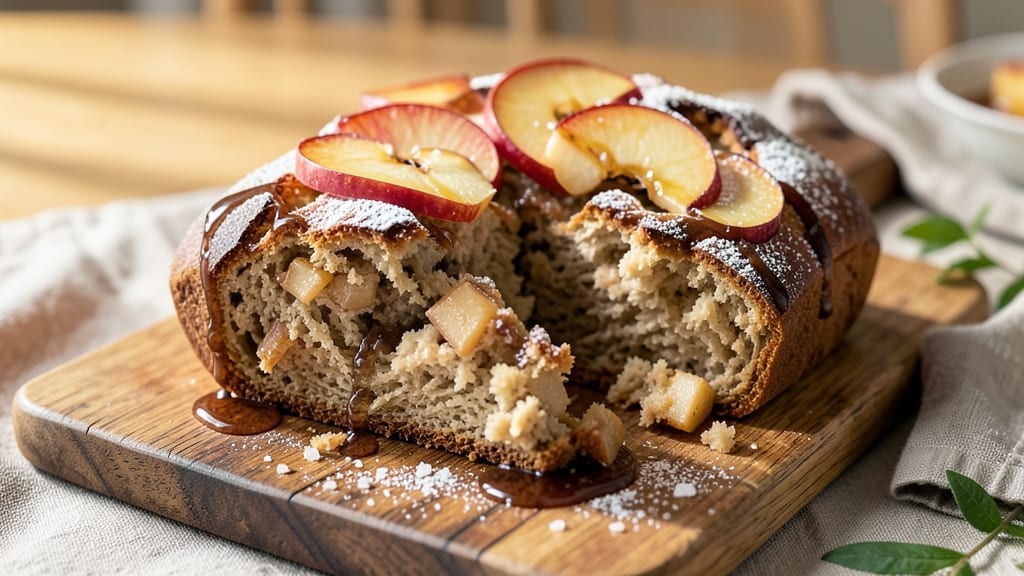
This apple pie sourdough bread recipe merges the rustic charm of artisanal sourdough with the nostalgic warmth of classic apple pie—all in one golden, swirled loaf. 🍏 The secret lies in a tangy, fermented dough wrapped around a spiced apple filling, creating a dessert that’s both comforting and impressive.
I’ve perfected the balance between crispy crust and tender crumb, with a buttery finish that’ll have everyone reaching for seconds.
The process begins with a 24-hour sourdough starter, which develops deep flavor and light texture. While the dough rests, a simple apple filling—simmered with cinnamon, sugar, and butter—prepares for its star turn.
The magic happens when the dough encases the filling, creating a loaf that’s as beautiful as it is delicious. No pie dish required; this recipe delivers all the cozy vibes of apple pie in bread form.
What you’ll end up with is a fragrant, swirled loaf with a caramelized crust and pockets of spiced apple filling throughout. The sourdough’s tang cuts through the sweetness, while the buttery crust adds richness.
It’s perfect for breakfast, dessert, or gifting—though it might not last that long. Ready to bake a loaf that tastes like autumn in every bite?
Whether you’re a sourdough newbie or a seasoned baker, this recipe simplifies the process without sacrificing flavor. The key is patience—letting the dough ferment fully ensures that light, airy crumb you crave.
Once baked, the aroma alone will fill your home with the scent of apple pie, proving that sometimes the best desserts are the ones you can tear into with your hands.
Ingredients for apple pie sourdough bread
Here’s what you’ll need to bake a fragrant, swirled loaf that tastes like autumn in every bite.
| Ingredient | Amount | Notes |
|---|---|---|
| All-Purpose Flour 🌾 | 5 cups | High-protein preferred for structure |
| Active Sourdough Starter 🍞 | 1 ½ cups | 100% hydration, bubbly and active |
| Granulated Sugar 🍚 | ½ cup | For dough and filling balance |
| Unsalted Butter 🧈 | ¾ cup | Cold, cubed for filling and crust |
| Large Eggs 🥚 | 2 whole | Room temperature for binding |
| Apple Cider 🍎 | 1 cup | Unfiltered for depth of flavor |
| Cinnamon 🌿 | 2 tbsp | Ground, aromatic variety |
| Ground Nutmeg 🌶️ | ½ tsp | Freshly grated preferred |
| Salt 🧂 | 2 tsp | Fine sea salt for even distribution |
| Granulated Apple Pie Spice 🍃 | 1 ½ tbsp | Homemade blend (cinnamon + nutmeg + allspice) |
| Honey 🍯 | 2 tbsp | For dough enrichment |
| Mixed Apples 🍏 | 2 lb | Granny Smith + Honeycrisp, peeled and diced |
| Cornstarch 🌾 | 1 tbsp | For filling thickening |
| Heavy Cream 🥛 | ¼ cup | For swirls and brushing |
The sourdough starter is the heart of this loaf, so don’t skimp on quality. King Arthur or Bob’s Red Mill flours work beautifully, but if you’re using store-brand, look for a protein content of at least 11%. Your starter should be bubbly and active—if it’s sluggish, feed it 12 hours before using. For the apples, Granny Smith for tartness and Honeycrisp for sweetness is ideal, but whatever’s in season works. The butter matters too—Plugrá or Land O’Lakes are reliable, but avoid ultra-processed margarine. If you’re short on time, a 24-hour cold proof in the fridge enhances flavor without extra effort.
No apple cider? Unsweetened apple juice with a splash of lemon juice works in a pinch, but the cider’s depth is worth seeking out. Short on apples? Substitute with 1.5 cups of canned apple pie filling, but reduce the sugar by 1 tbsp. The filling needs to thicken properly—if it’s too runny, add an extra 0.5 tbsp of cornstarch. For the dough, if you’re worried about overmixing, use a stand mixer with the dough hook on low speed. And if you’re feeling fancy, swap the honey for maple syrup—it adds a subtle earthiness that pairs perfectly with the cinnamon.
This loaf keeps beautifully—wrap it in parchment and store at room temperature for 2 days, or freeze for up to 3 months. To reheat, wrap in foil and warm in a 350°F oven for 10 minutes. The filling stays moist, but the crust crisps up again like magic. I always make a double batch—one for the freezer and one to enjoy immediately. The aroma alone will fill your kitchen with the scent of apple pie, so bake when you’re ready for a cozy treat.
Why You'll Love This Recipe
- No-Knead Magic: I swear by this recipe when I’m too tired to shape dough—just mix, rest, and bake. The sourdough starter does all the work while I sip coffee.
- Taste Like Fall: That caramelized sugar and butter combo? It’s like biting into warm apple pie crust—except you get the whole loaf. Honestly, the first slice makes me forget I’m not eating dessert.
- Breakfast to Brunch: Toast it for a buttery morning loaf, or serve thick slices with jam for a lazy weekend brunch. My roommates still steal my extra slices when I “forget” to put them away.
- Leftovers That Last: One loaf feeds my family for days—sandwiches, toast, or even French toast. Between us, the butter and sugar make it disappear faster than I can reheat it.
Step-by-step instructions for apple pie sourdough bread
This buttery, apple-cider swirled loaf delivers bakery-style flavor with a crisp crust and tender crumb.
👨🍳 Step 1: Mix the Dough with Sourdough Starter
In a large mixing bowl, whisk together the 5 cups all-purpose flour, 2 tbsp cinnamon, 0.5 tsp ground nutmeg, 2 tsp salt, and 1.5 tbsp granulated apple pie spice. Create a well in the center and add the 1.5 cups active sourdough starter, 0.5 cup granulated sugar, and 2 tbsp honey. Mix until a shaggy dough forms.
Add the 2 whole large eggs and 1 cup apple cider, mixing until combined. Gradually incorporate the 0.75 cup cold unsalted butter, one cube at a time, pressing it into the dough with your fingers. The butter should be cold enough to hold its shape but soft enough to mix in smoothly. Once fully combined, turn the dough onto a lightly floured surface and knead for 8-10 minutes until smooth and elastic. The dough should be slightly tacky but not sticky—if it sticks, add 1-2 tablespoons more flour as needed.
🥘 Step 2: Prepare the Apple Filling and Swirl
In a medium bowl, combine the 2 lb mixed apples, 1 tbsp cornstarch, and 2 tbsp granulated sugar. Toss to coat evenly, then let sit for 10 minutes to soften slightly. In a small saucepan, warm the 0.25 cup heavy cream over medium heat until it just begins to simmer. Pour the warm cream over the apple mixture and let it sit for 5 minutes to thicken.
Divide the dough into three equal portions (about 1⅓ cups each). Roll each portion into a 12-inch log about 3 inches wide. On a parchment-lined baking sheet, arrange the dough logs side by side. Spoon the apple filling down the center of the logs, creating a 3-inch wide strip along the length. Gently press the filling into the dough with your fingers, then use a bench scraper to swirl the dough around the filling, creating a marbled effect. Cover loosely with plastic wrap and refrigerate for 1 hour to firm up.
🔥 Step 3: Shape and Proof the Loaf
Preheat your oven to 375°F and position a rack in the lower third. On a lightly floured surface, gently roll the chilled dough into a 12x8-inch rectangle, about ½-inch thick. Using a sharp knife, score the dough into 8 equal rectangles (about 2x4 inches each). Starting at one short end, roll the dough tightly into a log, pinching the seam to seal. Place the loaf seam-side down on a parchment-lined baking sheet.
Brush the loaf generously with melted butter (reserve 2 tbsp for brushing later), then cover loosely with plastic wrap. Let the loaf proof in a warm place for 1-1.5 hours, or until it has risen by about 50% and feels springy to the touch when pressed gently. The dough should jiggle slightly when shaken. Preheat the oven to 375°F while the loaf proofs.
🔥 Step 4: Bake to Golden Perfection
Bake the loaf for 30-35 minutes until it is deep golden brown and sounds hollow when tapped on the bottom. Brush the top with the reserved 2 tbsp melted butter and bake for an additional 5-10 minutes until the crust is crisp and deeply caramelized. For extra shine, brush with a little apple cider after removing from the oven.
Transfer the loaf to a wire rack and let it cool for at least 1 hour before slicing. The internal temperature should reach 190°F for a perfectly tender crumb. Slice into 8 even pieces and serve warm with a pat of softened butter or a drizzle of honey. The aroma alone will make your kitchen smell like autumn in a bakery!
Pro Tips For Making Apple Pie Sourdough Bread
- Use Cold Butter: If your dough feels too sticky or fights you during shaping, chill that butter first. I learned this the hard way—room-temperature butter melts into chaos, and your bread will either spread like a pancake or collapse under its own weight. Cut the butter into small cubes, toss them in flour, and refrigerate for 15 minutes before mixing. Trust me, your hands (and your loaf) will thank you.
- Test Starter Activity: Skip the guesswork—your sourdough starter’s strength makes or breaks this recipe. The float test is foolproof: drop a spoonful in water. If it floats within 5 minutes, it’s ready. If not, feed it again and wait. I’ve ruined batches by assuming "bubbly enough" meant "good enough"—it doesn’t. This bread needs a lively starter, not just one that’s alive.
- Shape Tightly, Seam Down: Don’t half-ass the shaping. A loose, lumpy loaf won’t rise well, and the crust will crack unevenly. Stretch and fold the dough until the surface is smooth, then roll it into a tight log with the seam facing down. Press firmly to seal—this keeps the apples from bursting out during proofing. (Yes, even if you’re impatient like me, resist the urge to rush this.)
- Proof Until Doubled: The dough’s got to really rise, or your bread will be dense and sad. Cover it and let it sit until it’s nearly doubled in size—about 1.5 to 2 hours, depending on your kitchen’s warmth. If you’re in doubt, give it 10 more minutes. I used to pull it too soon because I wanted to bake it now, but the flavor and texture pay off when you wait. (Your future self will notice the difference.)
Pro cooking tips for great apple pie sourdough bread
Starter Prep Tips
Your sourdough starter is the foundation—never skip the 24-hour activation before using. I feed mine with equal parts flour and water (1:1 ratio) and let it sit at 70°F for 12 hours before baking.
Look for bubbles on top and a slightly domed surface—this means it’s ready. For extra insurance, do a float test: drop a spoonful in water—if it floats, it’s active! 🌟
Dough Temperature Control
Cold butter and room-temperature eggs are non-negotiable for the perfect texture. I keep my butter in the fridge until 5 minutes before mixing, then cut it into ½-inch cubes for even distribution.
The dough should feel slightly tacky but not sticky—if it’s too wet, add 1 tbsp flour at a time until it comes together. For a lighter crumb, let the dough rest 30 minutes after mixing before shaping.
Filling Thickness Tricks
The apple filling must thicken properly to avoid a soggy loaf. I simmer the apples with cornstarch for 3-4 minutes until they release juices, then mix in the warm cream. For a thicker consistency, add ½ tsp extra cornstarch if needed.
Pro tip: Let the filling cool 10 minutes before swirling—warm filling melts the butter in the dough too quickly. 🍏
Swirl Technique Mastery
Use a bench scraper to create clean, even swirls—press firmly but gently to avoid tearing the dough. I roll the logs lengthwise (not widthwise) to maximize surface area for caramelization.
For a more dramatic swirl, fold the dough over the filling twice before sealing. Chill the shaped loaf 1 hour to prevent spreading during proofing.
Proofing Perfection
Proof your loaf in a warm, draft-free spot (I use my oven with the light on). The dough should spring back slowly when pressed gently—it’s ready when it’s 50% larger than its original size.
For extra rise, place the bowl over a pan of hot water (not boiling) to create a humid environment. Overproofing is the enemy—1-1.5 hours max for this recipe. ⏱️
Baking Secrets
Bake on the lower rack for a crisper crust and even browning. I rotate the pan halfway through for uniform color. For a deeper caramelization, brush the loaf with apple cider in the final 5 minutes—it adds a glossy finish and enhances the apple flavor.
Let it cool 1 hour before slicing; the filling sets as it cools, preventing a gummy texture. 🔥
Nutrition facts
Frequently asked questions
Can I make this recipe without a sourdough starter?
For a quick substitute, use 1.5 cups warm water and 1.5 tsp active dry yeast instead of the starter. Let the yeast mixture sit for 5-10 minutes until foamy before adding to the dry ingredients. The flavor won't be identical, but the texture will still be delicious.
How do I know when the apple filling is thick enough?
The filling should coat the back of a spoon but still hold its shape when spooned. If it's too runny, simmer for 2-3 more minutes or add ½ tsp extra cornstarch. For a perfect consistency, let it cool 10 minutes before swirling into the dough to prevent melting the butter too quickly.
Can I use frozen apples instead of fresh?
Yes, but thaw and drain them first! Frozen apples release more moisture, so reduce the cornstarch by ½ tsp and add 1 extra tbsp sugar to balance the tartness. Cook the filling 5 minutes longer to thicken properly. The texture will be slightly softer, but still delicious.
Why did my loaf turn out dense instead of light?
This usually happens from overproofing or underproofing. The dough should spring back slowly when pressed (not quickly) and rise 50% during proofing. Also check your starter—if it wasn't active enough, the dough won't rise properly. For a lighter crumb, let the dough rest 30 minutes after mixing before shaping.
How can I make this gluten-free?
Replace the all-purpose flour with a 1:1 gluten-free baking flour blend (like Bob's Red Mill) plus ½ tsp xanthan gum. Use a gluten-free sourdough starter (made with the same blend) and reduce the proofing time by 20-30 minutes. The texture will be slightly denser, but still flavorful. For extra moisture, add 1 tbsp applesauce to the dough.