
Side Dishes
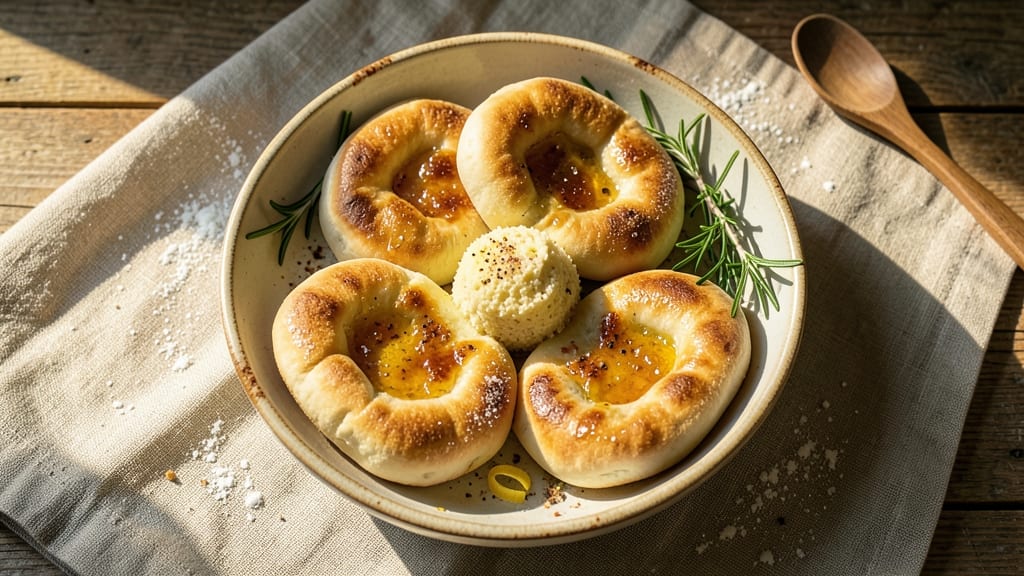
This Armenian pita bread recipe delivers the perfect balance of soft, pillowy layers and crisp edges—ideal for stuffing with labneh, olives, or grilled meats.
The secret lies in a high-hydration dough that develops elasticity through proper kneading and resting, ensuring each piece stretches thinly over a hot skillet for that signature char. I’ve perfected this technique over years of baking, and the results are always restaurant-quality at home.
The process begins with a simple dough of flour, water, yeast, and a touch of oil, which you’ll knead until smooth and elastic. Letting it rest for at least 1 hour allows the gluten to relax, making it easier to stretch into those signature thin, circular layers.
The key to success is baking on a hot, dry surface—whether a cast-iron skillet or pizza stone—to create a crisp exterior while keeping the inside tender and fluffy.
What you’ll end up with is a batch of freshly baked pita bread that’s soft enough to soak up sauces and sturdy enough to hold fillings without tearing. The aroma alone will have everyone gathering around the table, and the texture—crisp yet yielding—is impossible to resist.
Perfect for serving with mezze platters or wrapping around grilled lamb, this bread elevates any meal.
For extra flavor, try adding dried herbs like thyme or sesame seeds to the dough before shaping. Store any leftovers in an airtight container, and reheat briefly in a dry skillet to restore that fresh-baked crispness. Let’s get started!
Ingredients for armenian pita bread
Six simple ingredients transform into restaurant-quality Armenian pita—soft inside, crisp outside.
| Ingredient | Amount | Notes |
|---|---|---|
| All-Purpose Flour 🌾 | 3 ½ cups | Spooned and leveled, not packed |
| Active Dry Yeast 🍞 | ¼ tsp | Fresh yeast if preferred |
| Granulated Sugar 🍚 | ¼ tsp | Feeds the yeast |
| Fine Sea Salt 🧂 | ½ tsp | Diamond Crystal preferred |
| Vegetable Oil 🫒 | 1 ½ tbsp | Light neutral oil |
| Warm Water 💧 | 1 ¼ cups | 110°F for yeast activation |
| Dried Thyme 🌿 | ½ tsp | Or 1 tbsp fresh thyme |
| Sesame Seeds 🌰 | 1 tbsp | Optional for extra flavor |
The flour is everything here. King Arthur or Gold Medal brands work best—they’ve got that perfect gluten structure for stretchy dough. I grab my yeast from Trader Joe’s because it’s always fresh, but any active dry yeast will do. The water needs to be warm—like bathwater, not scalding. Too hot kills the yeast, and you’ll end up with flat, sad pita. If you’re using dried thyme, make sure it’s the leafy kind, not the ground stuff. For sesame seeds, Kirkland Signature at Costco is the best deal—just toast them lightly before adding to the dough.
No active dry yeast? Fresh yeast at half the amount works too, but it’s pricier. Running low on thyme? Oregano or dried rosemary at the same quantity gives a different but still delicious flavor. Skip the sesame seeds? No biggie—just leave them out. The oil matters less than you’d think, but vegetable or canola keeps things neutral. If you’ve got extra-virgin olive oil instead, it’ll add a subtle fruity note, but it’s not traditional. And for the love of all things pillowy, don’t skip the resting time—even if you’re impatient, give that dough at least an hour.
Freshly made pita stays soft for 2 days in an airtight container, but it’s best the first day. To reheat, wrap in foil and warm in a 350°F oven for 5 minutes—or better yet, crisp it up in a dry skillet over medium heat for 30 seconds per side. Freezing? Roll them up like wraps, then freeze. Thaw at room temp before reheating. Pro tip: if you’ve got leftovers, toast them in a skillet before stuffing—it adds that restaurant-worthy crunch.
Why You'll Love This Recipe
- No-Knead Magic: I swear by this dough—just mix, rest, and roll. No standing at the counter for ages, no overworked arms. That yeast and sugar combo does all the heavy lifting while you sip coffee.
- Crispy Yet Pillowy: The secret’s in the oil brush and hot pan—edges blister like a perfect golden crust, but the inside stays soft enough to wrap around anything. That’s the kind of texture you’ll fight over at dinner.
- Laundry List Helper: Freeze extras flat between parchment, and boom—you’ve got instant wraps for lunches or last-minute gyros. My kids grab them straight from the freezer (yes, even my picky eater).
- Pocketbook Friendly: Five ingredients, all pantry staples, and it stretches further than store-bought. I make a double batch, freeze half, and still save enough to treat myself to fancy cheese later. Win-win.
Step-by-step instructions for Armenian pita bread
Here's how to make pillowy, layered pita that's perfect for stuffing with your favorite fillings.
Activate the Yeast for Maximum Rise
In a small bowl, combine the 1.25 cups warm water (about 110°F), 0.25 tsp granulated sugar, and 0.25 tsp active dry yeast. Let it sit for 5-10 minutes until it becomes frothy and bubbly. This tells you the yeast is alive and ready to work—if it doesn't bubble, your bread won't rise properly.
While waiting, I like to test the water temperature by dipping my pinky finger in—it should feel warm but not hot. Too hot yeast dies, too cold it won't activate. Once bubbly, proceed immediately to avoid overproofing.
Mix the Dough Until Smooth
In a large mixing bowl, whisk together the 3.5 cups all-purpose flour and 0.5 tsp fine sea salt. Make a well in the center and pour in the yeast mixture along with the 1.5 tbsp vegetable oil. Add the 0.5 tsp dried thyme and mix with a wooden spoon until a shaggy dough forms.
For best results, I use a stand mixer with the dough hook attachment and knead on low speed for 5-7 minutes until the dough becomes smooth and elastic. You'll know it's ready when it pulls away cleanly from the sides of the bowl and springs back when pressed. If it's sticky, add just enough extra flour to handle it—this dough should be soft but not wet.
Let the Dough Rise Until Doubled
Lightly oil a large bowl, place the dough inside, and cover with a damp kitchen towel. Let it rise in a warm spot for 1-2 hours until it has doubled in size. I like to place my oven light on for 5 minutes first to create a warm environment—this helps speed up the process.
Gently press two fingers into the dough—if the indentation stays, it's ready. Overproofing makes flatbread dense, so don't let it rise beyond double. Once doubled, punch down the dough to release air bubbles and divide it into 6 equal balls (about 3-4 ounces each) for easy handling.
Shape the Pita into Perfect Rounds
On a lightly floured surface, roll each dough ball into a 6-inch circle about ¼-inch thick. Keep the remaining balls covered with the damp towel while you shape the others to prevent drying. The goal is even thickness—this ensures even cooking and those signature pillowy layers.
I press down gently with my palm while rotating the dough to create a smooth, uniform circle. For extra flavor, sprinkle the 1 tbsp sesame seeds on top of each round just before baking—this adds a nutty crunch that pairs perfectly with fillings like lamb or spiced vegetables.
Cook Until Golden and Pillowy
Preheat your oven to 425°F with a baking sheet inside to heat up. Place the shaped pita rounds on the preheated baking sheet, leaving 1 inch between them. Bake for 8-10 minutes until the edges are golden brown and the tops puff up slightly.
Here's the trick: as soon as they're done, transfer the pita to a clean kitchen towel. Fold the towel over and press down gently to trap the steam—this creates those signature soft layers. Let them rest for 5 minutes before stuffing or serving warm. The result? Flaky, pillowy bread that's perfect for sandwiches or dipping in hummus.
Pro Tips For Making Armenian Pita Bread
- Use Warm Oil: Armenian pita relies on that signature sheen and softness—skip the cold oil straight from the fridge. Heat your vegetable oil to about 100°F (38°C) before mixing it into the dough. I learned this the hard way when my first batch turned out dry and dense; the oil needs to be active to properly tenderize the gluten.
- Knead Until Silky: This isn’t about brute force—aim for dough that’s smooth, elastic, and just slightly tacky to the touch. Over-kneading makes pita tough, but under-kneading leaves it gummy. Work it for about 8–10 minutes by hand (or 5–6 minutes in a stand mixer with a dough hook) until it springs back slowly when poked.
- Proof in a Draft-Free Zone: Yeast is finicky, and a drafty kitchen will make your dough rise unevenly or collapse. Use a warm (not hot) spot—like the top of the fridge or a turned-off oven with the light on—and cover the bowl loosely with a damp towel. If your kitchen’s humid, add a splash of oil to the towel to lock in moisture.
- Roll Thinner Than You Think: The secret to that signature puff isn’t thickness—it’s heat and steam. Roll each ball to about ⅛-inch thick (yes, thinner than a quarter). Thicker pita steams instead of browning, while thin layers crisp beautifully in the skillet or oven. Trust the process; your first batch might look fragile, but it’ll hold up.
Storing and reheating this armenian pita bread
Room-Temp Revival
Freshly baked pita stays soft for 2 days when stored in an airtight container at room temperature. To revive stale pita, wrap it in a damp paper towel and microwave for 15-20 seconds—the steam instantly restores that pillowy texture.
For a crispier texture, place pita rounds in a dry skillet over medium heat for 20-30 seconds per side until golden. 💫
Oven Refresh Method
Preheat your oven to 350°F and place pita rounds on a baking sheet. Cover loosely with aluminum foil and heat for 3-5 minutes—this gentle warmth reactivates the gluten without drying them out.
For extra crispiness, remove the foil in the last minute. I always test one piece first to ensure it’s warm through before serving.
Freezer Storage Secrets
For long-term storage, wrap pita individually in plastic wrap and stack in a freezer bag with parchment paper between layers. They’ll keep for up to 3 months. To thaw, leave at room temperature for 30 minutes, then reheat in a skillet or oven.
Never microwave frozen pita—it turns rubbery. Pro tip: Toast frozen pita directly in a skillet for a crispy exterior while staying soft inside.
Skillet Crisp Perfection
My favorite method for reheating is a hot, dry skillet over medium-high heat. Place pita rounds in the skillet and cook for 15-20 seconds per side until golden and crisp.
The key is speed—don’t let them sit too long or they’ll dry out. This technique mimics fresh-baked texture and adds a smoky aroma that’s irresistible. 🔥
Steamer Trick
For a restaurant-style softness, use a steamer basket over boiling water. Place pita rounds in the basket (don’t overcrowd) and steam for 1-2 minutes until warmed through. This method preserves moisture better than oven reheating and is perfect for serving with dips like labneh or tahini.
The result is a cloud-like texture that’s impossible to resist.
Portion Control Tips
If you’re reheating multiple pita rounds, work in batches to maintain even heat. Overcrowding the skillet or oven leads to uneven cooking—some pieces will be crispy while others stay doughy.
I reheat 2-3 pita at a time in a 10-inch cast-iron skillet for best results. For large gatherings, preheat your oven or skillet thoroughly to ensure consistent texture every time.
Nutrition facts
Frequently asked questions
Why does Armenian pita bread need such a long resting time?
The 1-hour rest is crucial for developing gluten elasticity, which gives the bread its signature stretch. Without resting, the dough stays tough and won't create those perfect pillowy layers when baked. Think of it like giving the gluten time to relax and strengthen—just like stretching before a workout!
Can I make Armenian pita without a stand mixer?
Knead by hand for 8-10 minutes on a lightly floured surface until the dough becomes smooth and elastic. Press it with your knuckles—if it springs back, it's ready. The key is consistent pressure and rotation, just like you would with pizza dough. Patience pays off!
What's the best way to store homemade Armenian pita?
Keep pita in an airtight container at room temperature for up to 2 days—it stays soft best this way. For longer storage, freeze wrapped in plastic for 3 months. The secret to revival? A quick 15-second microwave steam or 20-second skillet crisp brings back that fresh-baked magic.
Can I add other herbs besides thyme?
Yes! Try dried oregano, rosemary, or za'atar for Middle Eastern flavor. For a savory twist, add 1 tsp garlic powder or ½ tsp onion powder to the dough. Just remember—herbs should complement, not overpower, the bread's natural taste. Start with ½ tsp of any new herb to test the flavor.
Why did my pita turn out dense instead of pillowy?
This usually happens from overproofing (letting the dough rise too long) or under-kneading. Check your yeast first—it should bubble in 5-10 minutes. Also, ensure you're baking on a hot surface (like a preheated baking sheet) and pressing the bread immediately after baking to trap steam. A little practice makes perfect!