
Side Dishes
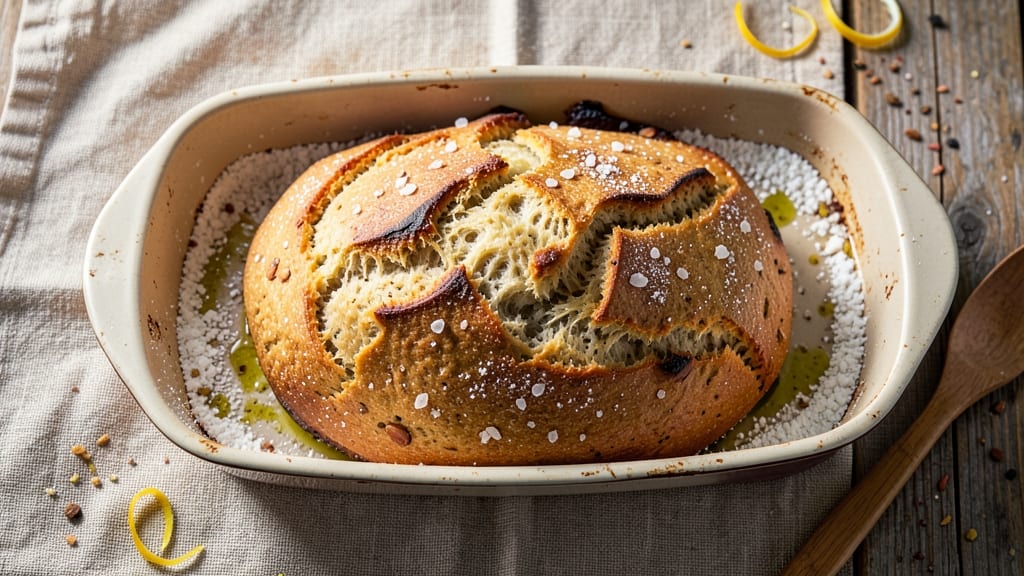
This award-winning gluten-free bread recipe delivers the crispy crust and light-as-air texture you crave—without sacrificing flavor or structure. After years of testing and refining, I’ve perfected a blend of gluten-free flours and hydration techniques that create a loaf so impressive, it rivals traditional wheat bread.
The secret lies in precise measurements and a gentle proofing process that develops flavor without relying on gluten’s natural elasticity.
What sets this recipe apart is its ability to achieve a crispy crust while maintaining a tender, airy crumb—something many gluten-free loaves struggle with. We’ll use a combination of xanthan gum and psyllium husk to mimic gluten’s binding properties, ensuring your bread holds its shape and slices cleanly.
The slow fermentation also deepens the flavor, giving you a bread that’s rich, slightly tangy, and perfect for toast, sandwiches, or serving with soups.
By the time you pull this loaf from the oven, you’ll have a gluten-free bread that’s golden and crackly on the outside, with a soft, pillowy interior that’s impossible to resist. The aroma alone—warm, buttery, and just slightly sweet—will have everyone asking for seconds.
This isn’t just a substitute; it’s a triumph of modern baking that proves gluten-free doesn’t mean giving up texture or taste.
Whether you’re baking for a dietary need or simply love a great loaf, this recipe delivers restaurant-quality results at home. Ready to master the art of gluten-free bread? Let’s get started with the ingredients and step-by-step instructions that will change the way you think about gluten-free baking forever.
Ingredients for award winning gluten free bread
Fourteen ingredients, one perfect loaf—gluten-free bread that rivals the real thing.
| Ingredient | Amount | Notes |
|---|---|---|
| White Rice Flour 🌾 | 1 ½ cups | Fine grind for best texture |
| Tapioca Starch 🌾 | ½ cup | For chewy texture |
| Almond Flour 🌰 | ½ cup | Blanched, finely ground |
| Xanthan Gum 🧂 | ½ tsp | Essential for structure |
| Psyllium Husk Powder 🌿 | 1 tbsp | For gluten-like elasticity |
| Instant Yeast 🍞 | 1 ½ tsp | Active dry works too |
| Granulated Sugar 🍚 | 1 tbsp | Feeds yeast fermentation |
| Salt 🧂 | 1 ½ tsp | Diamond Crystal preferred |
| Large Eggs 🥚 | 2 whole | Room temperature preferred |
| Unsalted Butter 🧈 | ½ cup | Cold for crispy crust |
| Warm Water 💧 | 1 ¼ cups | 110°F for yeast activation |
| Milk 🥛 | ¼ cup | Whole milk for richness |
The flours are the foundation here. White rice flour gives structure, while tapioca starch delivers that signature chew. Almond flour adds richness, but don't substitute regular almond flour—blanched and finely ground is key. Bob's Red Mill carries all three in bulk, and their gluten-free section is the best place to start. The psyllium husk might look intimidating, but it's what makes this bread hold together like traditional bread. Measure it precisely—too much and it gets gummy, too little and it won't rise properly. For the yeast, Fresh & Easy or King Arthur are reliable brands that stay potent longer.
No almond flour? Oat flour works in a pinch, though texture will differ slightly. Running short on tapioca? Arrowroot powder at the same amount keeps things chewy. The butter is non-negotiable for that crispy crust—Earth Balance vegan butter works if you need dairy-free, but traditional butter gives the best results. Eggs can be swapped for flax eggs (2 tbsp ground flax + 6 tbsp water), though they won't give the same lift. For the milk, any kind works, but whole milk makes the crumb richer. And if your yeast is old? Test it first—drop a pinch in warm water with sugar; if it bubbles in 5 minutes, it's good to go.
Mix the dry ingredients first—whisk the flours, xanthan gum, psyllium, sugar, and salt in a large bowl. The psyllium needs to hydrate properly, so let it sit with the warm water for 5 minutes before adding anything else. This dough is sticky—use a silicone spatula and don't overmix. For storage, wrap the loaf in a clean kitchen towel inside a paper bag to keep it fresh for 3-4 days. Freezes beautifully too—slice first, then freeze for perfect toast portions. The crust stays crispy for days when stored this way.
Why You'll Love This Recipe
- No-Knead Magic: I swear by this—just mix, let it rise, and bake. The psyllium husk does all the heavy lifting while I sip coffee, no fancy equipment needed.
- Taste Like Real Bread: That crispy crust? The almond flour adds nutty depth, while the tapioca starch keeps it tender inside. Honestly, my gluten-sensitive friends beg for seconds.
- Weeknight & Holiday Hero: Toss it in a lunchbox, serve with soup, or tear it for sandwiches. Between us, it’s my go-to for Thanksgiving leftovers—no one guesses it’s gluten-free.
- Budget-Friendly Staple: A single batch costs less than store-bought loaves, and it keeps for days. I freeze slices for toast—no waste, just pure convenience. (Yes, even on a Tuesday night.)
Step-by-step instructions for gluten-free bread
Here's how to craft bread so light and crispy it'll fool gluten-free skeptics every time.
Mix the Dry Ingredients with Precision
In a large mixing bowl, combine the 1.5 cups white rice flour, 0.5 cup tapioca starch, and 0.5 cup almond flour. Whisk vigorously until thoroughly blended—this ensures even distribution of the fine particles. Add the 0.5 tsp xanthan gum and 1 tbsp psyllium husk powder, then mix again to eliminate any clumps. These binders are what give gluten-free bread its structure, so don't skip this step.
The psyllium husk powder will look like tiny specks at first, but as you whisk, it will begin to absorb moisture and form a gel-like consistency. This is normal and essential for achieving that bread-like elasticity. I like to use a wire whisk for this part because it gets into all the nooks and crannies better than a spoon.
Activate the Yeast with Warm Liquid
In a separate bowl, whisk together the 1.25 cups warm water (about 110°F), 0.25 cup milk, 1 tbsp granulated sugar, and 1.5 tsp salt until fully dissolved. The water should feel warm to the touch but not hot—yeast dies in temperatures above 120°F. Add the 1.5 tsp instant yeast and let the mixture sit for 5-7 minutes until it becomes frothy.
You'll know the yeast is active when you see bubbles forming on the surface and the mixture smells slightly sweet and yeasty. If nothing happens after 10 minutes, your yeast may be dead—start over with fresh yeast. This activation step is critical because it kickstarts the fermentation process that creates that light, airy texture we're after.
Combine Wet and Dry Ingredients
Pour the activated yeast mixture into the dry ingredients and mix on low speed with a stand mixer (or by hand) until just combined. Add the 2 whole large eggs and 0.5 cup cold unsalted butter, mixing until the butter is incorporated but not melted. The dough will be thick and sticky—this is normal for gluten-free bread. Scrape down the sides of the bowl as needed to ensure everything gets mixed.
At this stage, the dough should hold together when pressed gently. If it feels too wet, add 1 tablespoon of white rice flour at a time until it reaches the right consistency. The goal is a dough that's cohesive but still workable—think of it as a thick, wet batter rather than traditional bread dough. This texture is what allows us to achieve that crispy crust while keeping the interior light.
Let the Dough Rest and Rise
Cover the mixing bowl with a damp towel and let the dough rest at room temperature for 1 hour. This resting period allows the psyllium husk to fully hydrate and the gluten substitutes to develop their binding properties. You'll notice the dough will become slightly less sticky and more cohesive during this time.
After the initial rest, place the dough in a greased 9x5-inch loaf pan and smooth the top with a wet spatula. Cover again with the damp towel and let it rise at room temperature for another 1-2 hours, or until it has nearly doubled in volume. The dough should feel springy when pressed gently with your finger—this indicates proper fermentation. If your kitchen is cold, you may need to extend this time to 3 hours for optimal rise.
Bake to Golden Perfection
Preheat your oven to 375°F with a baking stone or inverted baking sheet on the middle rack. This helps create steam during baking, which is crucial for that crispy crust. Brush the risen dough with a bit of milk (about 1 tablespoon) and sprinkle with a pinch of salt for extra flavor and color.
Bake for 45-50 minutes until the bread is deep golden brown and sounds hollow when tapped on the bottom. The internal temperature should reach 205°F at the center. Here's the thing—gluten-free bread can dry out quickly, so don't open the oven door during the first 30 minutes of baking. The steam is what creates that beautiful crispy crust while keeping the interior moist.
Once baked, transfer the bread to a wire rack and let it cool completely before slicing. This resting period prevents the bread from becoming gummy. For the crispiest crust, slice the bread while still slightly warm and serve immediately. Store any leftovers in an airtight container at room temperature for up to 3 days, or freeze for up to 3 months for freshness.
Pro Tips For Making Award Winning Gluten Free Bread
- Mix the Psyllium Last: I learned this the hard way—adding psyllium husk powder early turns your batter into glue. Wait until after you’ve combined the wet and dry ingredients, then whisk it in with the almond flour. This keeps the texture light and prevents a dense, gummy mess.
- Preheat Pan to 375°F: Sounds basic, but I used to skip this, and my bread would steam instead of crisp. A hot pan (not scorching) guarantees a golden crust on the bottom and sides—no need to fight for color later. Cast iron or a heavy skillet works best.
- Skip the Overmixing: Gluten-free dough behaves like a toddler—handle it too much, and it gets stubborn. Mix just until the almond flour is incorporated, then stop. Overworking it turns the tapioca starch into a paste, and your bread will taste gummy instead of tender.
- Brush with Oil Twice: After baking, let the bread cool 5 minutes, then brush the top with melted butter or olive oil while it’s still warm. Do it again the next day—this isn’t just for flavor, it keeps the crumb soft for days. (Yes, even if you’re impatient like me.)
Creative variations of this recipe
Herb-Infused Variations
Swap out the basic seasoning for fresh rosemary and thyme—add 1 tbsp finely chopped rosemary and 1 tsp dried thyme to the dry ingredients for an aromatic twist. The herbs pair beautifully with the buttery richness, creating a loaf perfect for garlic butter toast.
For a Mediterranean flair, add 1 tsp dried oregano and ½ tsp red pepper flakes to the dough. 🌿
Sweet Loaf Adaptations
Transform this into a cinnamon-raisin loaf by mixing in ½ cup raisins and 1 tsp cinnamon with the dry ingredients. Replace 1 tbsp of the sugar with 1 tbsp honey for subtle sweetness.
Brush the baked loaf with a honey-glaze (mix 2 tbsp honey with 1 tbsp milk) for a restaurant-quality finish. This version works perfectly for French toast or dessert sandwiches.
Savory Add-Ins
For a cheesy pull-apart loaf, fold in ½ cup shredded cheddar or Parmigiano-Reggiano during the final mixing stage. Add 1 tsp garlic powder for extra depth. Another crowd-pleaser? Mix in 2 tbsp sun-dried tomatoes and 1 tbsp chopped basil for a Mediterranean-inspired twist.
These additions work best when baked in a pull-apart pan for maximum drama. 🧀
Seed & Nut Enhancements
Boost nutrition and texture by adding ¼ cup toasted pumpkin seeds or chopped walnuts to the dough. For a crunchy crust, sprinkle 1 tbsp sesame seeds or poppy seeds on top before baking.
These additions not only elevate flavor but also create a visually appealing loaf that’s perfect for sharing. Store-bought nut butters can also replace butter in a pinch—just reduce the liquid slightly to maintain consistency. 🌰
Dairy-Free & Egg-Free Options
Make this vegan-friendly by replacing the eggs with 2 flax eggs (2 tbsp ground flaxseed + 6 tbsp water) and using Earth Balance vegan butter. For the milk, unsweetened almond milk works well.
The texture will differ slightly, but the loaf remains moist and flavorful. If avoiding eggs entirely, ensure your psyllium husk is fully hydrated—it’s the key to binding without gluten. 🥛
Global Flavor Profiles
Give your loaf a French baguette vibe by shaping the dough into a long oval on a baking sheet, scoring the top with a sharp knife before baking.
For a German-style pretzel twist, brush the baked loaf with 1 tbsp melted butter and sprinkle with coarse sea salt after baking. A Japanese-inspired version swaps almond flour for white rice flour and adds 1 tsp matcha powder to the dry mix for a subtly earthy flavor.
Each variation keeps the core technique intact while offering exciting new directions. 🗺️
Nutrition facts
Frequently asked questions
Why does this gluten-free bread need psyllium husk?
Psyllium husk acts as a natural gluten substitute by creating elasticity and binding the dough together. Without it, the bread would crumble instead of holding its shape. The 1 tbsp in this recipe mimics gluten's structure, giving your loaf that satisfying chew and sliceability. Think of it as the secret ingredient that makes gluten-free bread behave like the real thing.
Can I make this recipe without a stand mixer?
This dough is perfectly mixable by hand using a sturdy spoon or silicone spatula. Just be prepared for some elbow grease—the sticky texture requires thorough mixing. Work in a large bowl and scrape the sides frequently to ensure all ingredients are fully incorporated. The dough should come together into a cohesive, thick batter that holds when pressed.
How do I know when the dough is properly risen?
Your dough is ready when it nearly doubles in volume and springs back slightly when pressed gently with your finger. For this recipe, it should take 1-2 hours at room temperature. If your kitchen is cold, extend to 3 hours. The dough will feel springy, not sticky—this indicates proper fermentation and gluten substitute activation.
Why does my gluten-free bread turn out dense?
Dense gluten-free bread usually results from overmixing, insufficient yeast activation, or improper hydration. To fix this: 1) Mix just until combined (don't overwork), 2) Ensure your yeast is fresh (test in warm water first), and 3) Don't skip the resting period—it allows psyllium to fully hydrate. Also verify your oven temperature is accurate (use an oven thermometer).
Can I use this dough for dinner rolls?
Yes! Divide the dough into 12 equal portions and shape into balls. Arrange on a baking sheet, cover with a damp towel, and let rise for 1 hour. Bake at 375°F for 15-18 minutes until golden. For extra flavor, brush with garlic butter before baking. The same dough works perfectly for rolls, just adjust baking time to 10-12 minutes for smaller sizes.