
Side Dishes
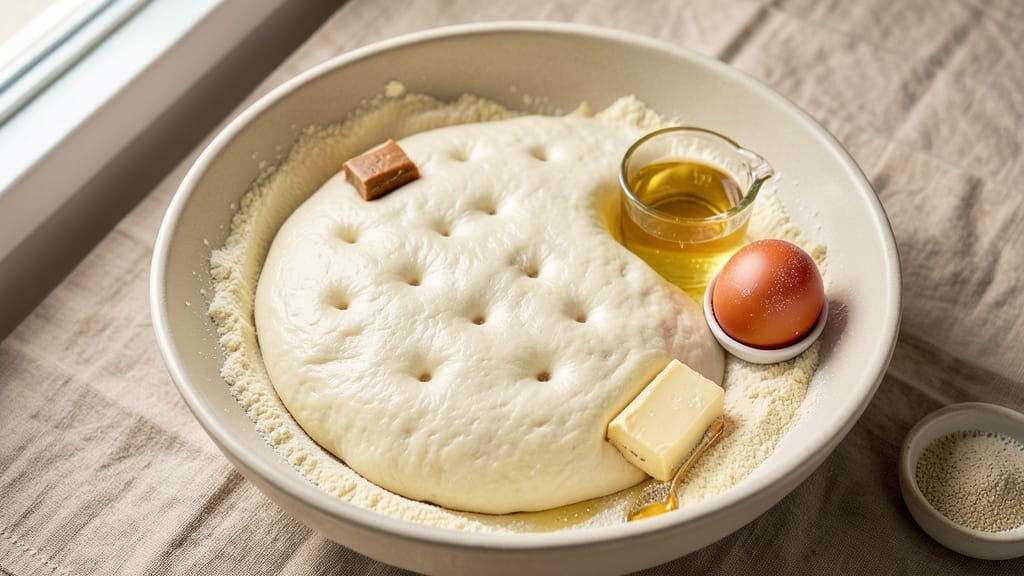
This all-purpose bread dough recipe transforms simple pantry staples into the foundation for everything from crispy garlic bread to fluffy dinner rolls. The secret lies in precise technique—kneading just enough to develop gluten without overworking the dough, then letting it rise until light and airy.
I've perfected this recipe over years of baking, ensuring it's foolproof for beginners while still delivering restaurant-quality results.
What makes this dough truly versatile is its adaptability—use it for sandwich loaves, pizza crust, or dinner rolls, all with the same base. The key steps include proper kneading (by hand or mixer), accurate proofing times, and gentle shaping to maintain structure.
Whether you're making a classic French baguette or soft dinner rolls, this dough delivers consistent texture and flavor every time.
By the time you pull it from the oven, you'll have golden, crusty bread with a tender interior—perfect for slicing, serving warm, or turning into garlic bread. The dough's neutral flavor allows it to absorb any seasonings or toppings you add, making it the ultimate blank canvas for baked goods.
Once you master this base, you'll never buy store-bought bread again.
For added flexibility, I'll share variations like enriched dough (with butter or eggs) or whole wheat substitutions, along with troubleshooting tips for common issues like sticking or overproofing. Let's get started on creating your perfect loaf!
Ingredients for all purpose bread dough
Eight simple staples unlock endless baking possibilities—from crusty baguettes to soft dinner rolls.
| Ingredient | Amount | Notes |
|---|---|---|
| All-Purpose Flour 🌾 | 4 cups | Sifted for light texture |
| Active Dry Yeast 🍞 | 2 ¼ tsp | Or 1 packet (2.25 tsp) |
| Granulated Sugar 🍚 | 1 tbsp | Feeds yeast for faster rise |
| Unsalted Butter 🧈 | ¼ cup | Cold, cubed for texture |
| Large Eggs 🥚 | 1 whole | Room temperature preferred |
| Warm Water 💧 | 1 ¼ cups | 110°F (43°C) ideal |
| Salt 🧂 | 1 tsp | Kosher or sea salt |
| Olive Oil 🫒 | 1 tbsp | For dough shaping |
The flour is your canvas. King Arthur or Bob's Red Mill brands give the best rise, but any all-purpose works in a pinch. Yeast is the magic—fresh is key, so check the date on that packet. Warm water is non-negotiable: too hot kills yeast, too cold slows it down. I always test mine with my pinky finger—should feel like bathwater. The butter adds richness, but cold cubes create pockets for flaky layers. No butter? Olive oil works perfectly.
No yeast? Instant yeast at half the amount saves time—no proofing needed. Short on butter? Applesauce or mashed banana keeps it moist (but no flaky crust). Eggs? Flax eggs (1 tbsp ground flax + 3 tbsp water) work for vegan versions. The sugar might seem small, but it’s essential—feeds the yeast to make that dough rise like a dream. For extra flavor, swap 1 tbsp of the sugar for honey or maple syrup. Pro tip: measure your flour by weight if you can—4 cups = 16 oz—for foolproof consistency.
Store unused dough in an airtight container with a damp towel—keeps 24 hours in the fridge. For longer storage, shape into a log, wrap tightly in plastic, and freeze for up to 3 months. Thaw overnight in the fridge before baking. Freshly baked? Cool completely, then slice and freeze for 1 month—perfect for quick toast. Double the batch and freeze half; you’ll thank me later when you’re craving fresh bread at midnight.
Why You'll Love This Recipe
- Pantry Staples Only: I swear by this dough because it uses what I already have—no specialty flours or weird ingredients. Five ingredients, one bowl, and you’re golden. (Yes, even when I forget to buy yeast.)
- Buttery Rich Bite: That soft, pillowy interior with a hint of brown sugar warmth? The butter and egg make it taste like a bakery loaf, not sad sandwich bread. I’ll take the extra five minutes to knead it any day.
- Shape It All: Need garlic knots, dinner rolls, or a quick flatbread? Same dough, endless possibilities. I’ve made it into cinnamon swirls for breakfast, sliders for game day, and even a makeshift pizza crust when I’m lazy.
- Leftovers That Last: This dough keeps beautifully in the fridge for days—perfect for when I’m too tired to bake. Freeze half the batch, and you’ve got a backup for when life gets hectic. (Trust me, I’ve tested this.)
Step-by-step instructions for all-purpose bread dough
Here's how to create a foolproof dough base that works for everything from crusty loaves to soft rolls.
Activate the Yeast with Warm Water and Sugar
In a large mixing bowl, combine the 1.25 cups warm water and 1 tbsp granulated sugar. The water should feel warm to your touch—around 110°F—but not hot enough to burn your fingers. Sprinkle the 2.25 tsp active dry yeast over the water and let it sit for 5-10 minutes until it becomes foamy and bubbly. This tells you the yeast is alive and ready to work.
If the yeast doesn't foam, it's dead, and you'll need to start over. I've had this happen when water was too hot or yeast was old. Once it's active, you're ready for the next step—this is the foundation of your dough's rise.
Mix Wet Ingredients and Combine with Dry
Add the 1 whole large egg, 1 tsp salt, and 0.25 cup cold cubed unsalted butter to the yeast mixture. Use a wooden spoon or your hands to gently mix until the butter starts to soften slightly. Then, gradually add the 4 cups all-purpose flour, mixing just until the dough comes together and pulls away from the sides of the bowl.
Don't overmix—just combine until you have a shaggy mass. The dough will feel sticky, but that's normal. This stage is all about getting everything incorporated without developing too much gluten yet. If it's too sticky to handle, sprinkle a little extra flour, but don't go overboard.
Knead Until Smooth and Elastic
Turn the dough out onto a lightly floured surface and knead for 8-10 minutes by hand, or use a stand mixer with a dough hook on medium speed for 5-6 minutes. You're looking for a dough that's smooth, elastic, and springs back slightly when poked. It should feel firm but still slightly tacky—like the inside of your cheek.
I press down gently on the dough during the first minute to break up the gluten strands, then switch to folding and turning motions. If the dough sticks too much, wet your hands slightly instead of adding more flour. This ensures the right texture without making the dough dry.
First Rise Until Doubled in Size
Lightly oil a large bowl and place the dough inside, turning it to coat all sides. Cover the bowl with a damp kitchen towel or plastic wrap and let it rise in a warm place for 1-2 hours, or until it has doubled in size. The kitchen should feel warm—near a turned-off oven with the light on works great.
You'll know it's ready when the dough puffs up significantly and leaves an indent when you press your finger gently into it. If it doesn't rise much after 2 hours, your yeast might be weak or the environment too cold. Patience here pays off—rushing leads to dense bread.
Shape and Second Rise Before Baking
Punch down the risen dough to release air, then divide it into your desired shapes—whether it's a single loaf, rolls, or pizza dough. For shaping, I brush the dough with 1 tbsp olive oil to prevent sticking. Place the shaped dough on a baking sheet or in a greased bowl, cover again, and let it rise for another 30-60 minutes until puffy.
This second rise is quicker because the dough is already active. For rolls or pizza, you can skip the second rise and bake immediately after shaping. The dough is now ready to be baked into whatever bread creation you have in mind—crusty loaves, soft dinner rolls, or chewy pizza crust.
Pro Tips For Making All Purpose Bread Dough
- Bloom the Yeast First: Skip mixing yeast straight into flour—it dies faster. Instead, dissolve it in warm water (110°F) with sugar first, then let it sit for 5-10 minutes until foamy. I learned this the hard way after kneading dough that never rose properly because the yeast was still asleep.
- Cut Cold Butter: Use a chilled butter knife (or freeze the butter for 15 minutes) to cut the butter into the flour. This keeps the dough from overworking and ensures those flaky layers form properly. Sounds weird, but it works—your bread will thank you.
- Don’t Over-Knead: Stop when the dough springs back slowly after poking it—usually 8-10 minutes by hand. Overworking it makes gluten tough, and your bread will turn out dense. I used to go until my arms ached, but now I set a timer and walk away.
- Proof at Room Temp: Let the shaped dough rise in a warm spot (75-80°F) until it’s nearly doubled—about 1-1.5 hours. A too-cold oven or counter slows fermentation, while too-hot air kills the yeast. I use a turned-off oven with a bowl of hot water for consistent results.
Essential equipment for perfect results
Mixing Essentials
Start with a large mixing bowl—I recommend a stainless steel bowl (like OXO Good Grips) for durability and easy cleanup. A wooden spoon or dough whisk helps dissolve the yeast and sugar without overmixing.
For measuring, a digital kitchen scale (like Escali Primo) ensures precision—4 cups all-purpose flour equals 16 ounces for consistent results. 💧
Kneading Tools
For hand-kneading, a lightly floured surface (I use a marble pastry mat) prevents sticking. If you prefer a mixer, a KitchenAid stand mixer with the dough hook attachment saves time and effort.
Proofing Setup
A proofing basket (like Nordic Ware) gives professional results for baguettes or boules, but a greased mixing bowl works just as well for rolls. Keep your dough warm with a proofing box (I use a Breville Smart Oven) or place it near a turned-off oven light. A digital thermometer ensures the environment stays at 78-82°F—ideal for yeast activity.
Shaping Accessories
For shaping, olive oil (I love California Extra Virgin) brushed on your hands prevents sticking. A bench scraper (like OXO Good Grips) helps divide dough cleanly. For pizza crust, a rolling pin (I prefer marble) keeps thickness consistent.
Pro tip: Dust your work surface with semolina flour for extra grip and a rustic texture.
Baking Gear
Invest in a baking stone (like Lodge Preheated) for crispy crusts—preheat it for at least 30 minutes before baking. A pizza peel (I use wooden) makes transferring dough easy.
For rolls, a half-sheet pan lined with parchment paper prevents sticking. A meat thermometer ensures your bread reaches 190-210°F internally for perfect doneness.
Storage Solutions
Store unused dough in an airtight container (I use Glasslock) with a damp towel to keep it fresh for 24 hours. For long-term storage, freezer bags (like Ziploc) work best—squeeze out air to prevent freezer burn.
A bread box (like West Elm) keeps baked goods fresh for days by maintaining humidity. 💡
Nutrition facts
Frequently asked questions
Can I make this dough without a stand mixer?
This recipe works perfectly by hand. After combining your ingredients, turn the dough onto a lightly floured surface and knead for 8-10 minutes using the "fold and turn" method. Wet your hands slightly if the dough sticks—this keeps it elastic without needing extra flour. The key is consistency: knead until the dough springs back when poked and feels smooth like the inside of your cheek.
How do I know when the dough has risen enough?
Your dough is ready when it has visibly doubled in size and leaves a slight indent when you gently press your finger into it (about 1/2 inch deep). For the first rise, this typically takes 1-2 hours in a warm environment. If it doesn't rise much after 2 hours, your yeast may be inactive—try warming the dough near a turned-off oven light or check your water temperature (should be 110°F).
Can I substitute butter with oil for this dough?
Yes, you can replace the 1/4 cup butter with 2 tablespoons olive oil or melted shortening for a softer texture. The oil won't create flaky layers like butter, but it works well for rolls or pizza crust. For extra richness, try 2 tablespoons sour cream or Greek yogurt instead—this adds moisture and a subtle tang without altering the dough's structure.
What if my dough sticks to everything?
Sticky dough is normal! Wet your hands slightly (not soaking) when handling it—this prevents tearing the gluten strands. For shaping, brush your work surface with olive oil or dust with semolina flour instead of extra flour. If the dough is too wet, add 1 tablespoon flour at a time until it's just manageable. Pro tip: A bench scraper helps lift sticky dough without sticking to your hands.
How can I make this dough rise faster?
To speed up rising, place your dough in a warmer environment (80-85°F). Try these methods: Turn your oven light on (but keep the oven off), place the dough near a sunny window, or use a proofing box. You can also add 1/2 teaspoon extra sugar to feed the yeast faster. Just be careful—dough rises too quickly when overproofed, leading to a dense texture. Monitor closely and don't exceed 1.5 hours for the first rise.