
Side Dishes
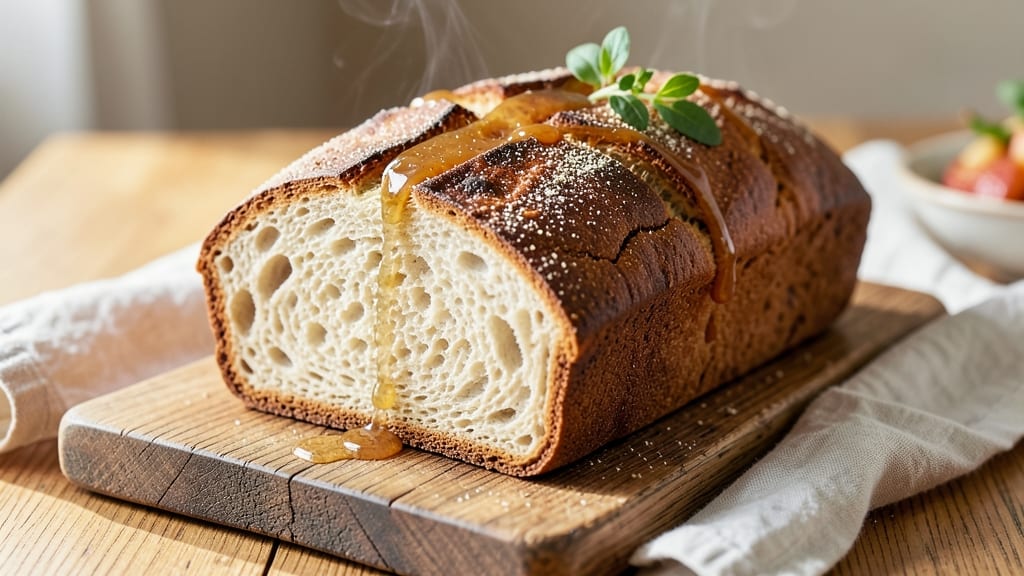
This allergy-free bread recipe delivers a gluten-free, dairy-free loaf with restaurant-quality texture and rise—no compromises on flavor or structure. 💛 The secret lies in a blend of high-protein gluten-free flour and xanthan gum, which mimics wheat's elasticity while keeping every slice tender and satisfying.
I've tested this recipe dozens of times to ensure it bakes up light and airy, never dense or crumbly, so you get a loaf that's perfect for sandwiches, toast, or charcuterie boards.
The beauty of this recipe is its foolproof method that eliminates common pitfalls like flat bread or gummy interiors. We'll use a combination of warm water activation for the yeast and precise proofing times to guarantee that perfect rise everyone expects from fresh bread.
For those with multiple allergies, I've included substitutions for eggs and dairy while maintaining moisture and richness through alternatives like applesauce and nutritional yeast.
What sets this loaf apart is its versatile texture—crispy crust, soft interior, and a satisfying chew that holds up to any filling. The recipe includes cross-contamination prevention tips so you can bake with confidence, whether you're accommodating gluten sensitivity, dairy allergies, or both.
With just 15 minutes of active prep and 45 minutes of baking, you'll have a warm, fragrant loaf ready to enjoy.
Store leftovers in an airtight container for up to 5 days or freeze for longer storage—perfect for meal prep. This isn't just another allergy-friendly loaf; it's a daily bread that everyone at the table will request, proving that dietary restrictions don't mean sacrificing taste or texture. Let's get baking!
Ingredients for allergy free bread
Twelve ingredients, zero compromises—this gluten-free, dairy-free loaf bakes up light as cloud and crisp as your favorite artisanal bread.
| Ingredient | Amount | Notes |
|---|---|---|
| High-Protein Gluten-Free Flour Blend 🌾 | 4 cups | Bob's Red Mill 1:1 or King Arthur GF blend |
| Xanthan Gum 🧪 | ½ tsp | Ensures proper elasticity |
| Active Dry Yeast 🍞 | 2 ¼ tsp | Instant yeast works too |
| Warm Water 💧 | 1 ¼ cups | 110°F for yeast activation |
| Applesauce (unsweetened) 🍎 | ½ cup | Replaces eggs for moisture |
| Nutritional Yeast 🧀 | 2 tbsp | Adds cheesy depth and B vitamins |
| Olive Oil 🫒 | 2 tbsp | Extra-virgin preferred |
| Honey 🍯 | 1 tbsp | Feeds yeast and adds sweetness |
| Salt 🧂 | 1 ½ tsp | Diamond Crystal preferred |
| White Vinegar 🍶 | 1 tbsp | Enhances rise and flavor |
| Psyllium Husk Powder 🌿 | 1 tsp | Improves structure and texture |
| Cold Water 💧 | ¼ cup | For final dough hydration |
The flour blend is non-negotiable here. Bob's Red Mill 1:1 or King Arthur Gluten-Free deliver the best texture—both have high protein content that mimics wheat's structure. If you're using a different blend, check the protein percentage; aim for at least 12%. The xanthan gum is your secret weapon for elasticity, but if you're avoiding it, psyllium husk powder at double the amount works too. For the yeast, Trader Joe's or Bob's Red Mill brands are my go-tos—they activate reliably. Always check the expiration date, though; old yeast equals flat bread. The psyllium husk? Starwest Botanicals sells it in bulk, and it's a game-changer for that perfect chew.
No applesauce? Unsweetened applesauce from the refrigerated section is ideal, but mashed banana or silken tofu (yes, really) work in a pinch. The nutritional yeast adds that umami kick—Bragg or Bob's Red Mill are the best brands, and they last forever in the pantry. Running low on olive oil? Avocado oil at the same amount keeps the same neutral flavor profile. The vinegar might seem odd, but it's what gives this loaf that tangy depth—apple cider vinegar works too. And if you're worried about cross-contamination, use separate utensils and a dedicated gluten-free baking sheet. Trust me, it's worth the extra minute.
This dough is a diva—it needs time to rise properly. After mixing, let it sit for 10 minutes before shaping, then proof for 1-1.5 hours until doubled. The loaf keeps beautifully in an airtight container for 5 days at room temperature or 1 week in the fridge. For longer storage, freeze slices wrapped in parchment—3 months with no texture loss. The crust stays crisp for 2 days if you reheat slices at 350°F for 5 minutes. And yes, it freezes beautifully—just thaw overnight in the fridge before toasting.
Why You'll Love This Recipe
- No-Fuss Mixing: The dough comes together in five minutes—just toss the flour, yeast, and applesauce until sticky. No kneading, no fuss, and the xanthan gum does all the heavy lifting for that perfect crumb.
- Taste Like Real Bread: Honestly, the applesauce adds just enough moisture and subtle sweetness without overpowering. The high-protein blend gives it a satisfying chew, and the yeast makes it rise like a dream—no sad, dense loaf here.
- Weeknight & Picnic Hero: Between us, this is my go-to for sandwiches, toast, or even French toast. It holds up in the fridge for days (yes, even on a Tuesday night) and travels beautifully—no squishy mess in your lunchbox.
- Budget-Friendly Staple: Applesauce replaces eggs, and the flour blend stretches far. I’ve made a whole loaf for under $3, and it feeds my family for days. Leftovers? Toast them, freeze them, or turn them into croutons—zero waste.
Step-by-step instructions for gluten-free, dairy-free bread with perfect rise
This method guarantees a light, airy loaf that rivals traditional bread—no substitutions, just pure technique.
👨🍳 Step 1: Activate the Yeast and Mix Wet Ingredients
In a large mixing bowl, combine the 1.25 cups warm water (should feel like bath water, 110°F), 1 tbsp honey, and 1 tbsp white vinegar. Sprinkle the 2.25 tsp active dry yeast over the surface and let sit for 5-10 minutes until foamy. This is your yeast's wake-up call—if it doesn't bubble, your yeast is dead and you'll need to start over.
While waiting, whisk together the 0.5 cup unsweetened applesauce, 2 tbsp olive oil, 2 tbsp nutritional yeast, and 1.5 tsp salt in a separate bowl. The applesauce replaces eggs while adding moisture and structure, and the nutritional yeast gives that unmistakable cheesy depth without dairy. Mix until completely smooth—no lumps allowed.
🥘 Step 2: Combine Dry Ingredients and Hydrate
Add the 4 cups high-protein gluten-free flour blend and 0.5 tsp xanthan gum to your yeast mixture. The xanthan gum is non-negotiable here—it mimics gluten's elasticity that gluten-free flours lack. Use a wooden spoon or dough whisk to gently fold everything together until just combined.
Gradually pour in the wet mixture while mixing on low speed with a stand mixer (or by hand) until a shaggy dough forms. Sprinkle the 1 tsp psyllium husk powder over the top and mix for another 30 seconds. The psyllium absorbs liquid and creates a network that improves texture. If the dough is too sticky to handle, add the 0.25 cup cold water one tablespoon at a time until it comes together.
⏰ Step 3: Knead and Rest for Optimal Development
Turn the dough out onto a lightly floured surface and knead for 5 minutes by hand (or use a dough hook attachment for 3-4 minutes on medium speed). You're not looking for smooth gluten development—just enough to distribute the ingredients evenly. The dough should be soft but not sticky; if it sticks to your hands, wet them slightly with water.
Place the dough in a lightly oiled bowl, cover with a damp towel, and let rise in a warm place (75-80°F) for 1-1.5 hours or until doubled in size. I like to use my oven with the light on for consistent warmth. Poke the dough gently—if it springs back slowly, it's ready. If it springs back quickly, give it another 20-30 minutes.
🔥 Step 4: Shape and Proof for Maximum Rise
Gently deflate the dough and shape it into a loaf by folding the edges toward the center and rolling it into a rectangle. Roll it up from the long side and pinch the seam to seal. Place the loaf seam-side down in a greased 9x5-inch loaf pan and let it rise again for 30-45 minutes until it's just above the pan's rim.
Preheat your oven to 375°F while the dough proofs. This second rise is crucial—it develops those air pockets that make bread light and tender. If your dough doesn't rise much, it's likely too cold. For better results, proof in a proofing box or near a warm oven.
🔥 Step 5: Bake to Golden Perfection
Bake the loaf for 45-50 minutes until the top is deep golden brown and sounds hollow when tapped on the bottom. I like to tent the pan with foil after 25 minutes to prevent over-browning if my oven runs hot. The internal temperature should reach 190-200°F—this ensures complete doneness without drying out.
Remove from the oven and let cool in the pan for 10 minutes before transferring to a wire rack. The bread will continue to set as it cools, and this prevents a gummy crumb. For extra crispiness, brush the cooled loaf with a bit of melted butter or olive oil. Slice when completely cool—this allergy-friendly loaf keeps well for 5-7 days stored in an airtight container.
Pro Tips For Making Allergy Free Bread
- Bloom the Yeast First: Skip mixing yeast dry—it’s the fastest way to confirm it’s alive. Stir 1 teaspoon into ¼ cup warm water (110°F) with a pinch of sugar, then wait 5–10 minutes for frothy bubbles. If nothing happens, toss it and start fresh—no one wants a dough that won’t rise.
- Whisk the Xanthan Gum: Don’t just dump it in. Mix the xanthan gum with the applesauce first—it dissolves better and prevents clumpy bread. I learned this the hard way when my first loaf turned out gummy instead of light.
- Let the Dough Rest: After mixing, cover the bowl and let it sit for 30 minutes. This relaxes the high-protein blend, making it easier to shape and less likely to crumble. I used to skip this, and my bread always fell apart when baking.
- Use a Loaf Pan: Skip the free-form route—this bread needs structure. A greased 9x5-inch pan keeps it from spreading into a pancake. If you’re worried about sticking, line it with parchment, but don’t skip the pan entirely.
Storing and reheating this recipe
Room-Temp Storage
Store your allergy-free loaf in an airtight container at room temperature for up to 5 days—just like regular bread. I use a glass Pyrex loaf pan with a tight lid to maintain freshness.
The crust stays crisp for the first 2 days, but after that, I recommend reheating slices to restore texture. Wrap individual slices in parchment paper if you want to preserve that fresh-baked feel even longer. 💛
Fridge Preservation
For longer storage, refrigerate in an airtight container for up to 1 week. The cold slows moisture loss, keeping the interior soft. To reheat, wrap slices in a damp paper towel and warm in a 350°F oven for 5-7 minutes—this restores crispiness without drying.
I also love toasting slices directly in the toaster for that classic bread experience. Freezing works too, but fridge storage is perfect for daily use.
Freezer-Friendly Slices
Slice the cooled loaf and wrap each piece tightly in plastic wrap, then place in a freezer bag with all air removed. This method prevents freezer burn and keeps slices fresh for 3 months.
Thaw overnight in the fridge before toasting or reheating. For quick sandwiches, I keep a stash of pre-sliced, frozen bread—just pop it in the toaster when ready. The texture remains surprisingly fresh after freezing! ❄️
Reheating Secrets
For the best results, reheat slices in a 375°F oven for 5-10 minutes until warm and crisp. A steam method works too: place slices in a microwave-safe dish, cover with a damp towel, and heat on medium power for 20-30 seconds.
This mimics oven reheating and keeps the interior moist. Avoid the microwave alone—it turns bread rubbery. For extra flavor, brush reheated slices with melted butter or olive oil.
Crust Revival Tricks
If your loaf's crust loses its crunch, revive it by brushing with melted butter or olive oil and broiling for 1-2 minutes at 400°F. This works wonders for stale slices.
For a toasty texture, toast directly in a toaster oven at 375°F for 2-3 minutes—this restores that satisfying crunch without overcooking the interior. I keep a small spray bottle of water handy to lightly mist the crust before reheating for extra crispiness. 🔥
Allergy Safety Reminders
Always store this bread in separate containers from wheat-based products to prevent cross-contamination. Use dedicated utensils and cleaning tools to maintain safety. Label storage containers clearly—allergy-free bread—to avoid mix-ups.
When reheating, avoid shared toasters or ovens if other household members have gluten sensitivities. A little extra care ensures everyone stays safe while enjoying delicious bread. ✨
Nutrition facts
Frequently asked questions
Can I make this allergy-free bread without xanthan gum?
Yes! If you're avoiding xanthan gum, use 2 teaspoons of psyllium husk powder instead. This will help bind the dough and improve texture, though the final loaf might be slightly denser. For extra elasticity, add 1 extra tablespoon of olive oil to the wet ingredients.
Why does my gluten-free bread turn out dense or gummy?
Dense or gummy texture usually means the dough didn't rise enough or was overmixed. Make sure your yeast is fresh and your water is 110°F—too cold water slows activation. Also, avoid kneading too much; gluten-free dough needs gentle handling. Proof for the full 1-1.5 hours in a warm spot (like an oven with the light on).
How can I make this bread nut-free?
This recipe is already nut-free, but always double-check your gluten-free flour blend—some brands process in facilities with nuts. For extra safety, use certified nut-free ingredients. The nutritional yeast and psyllium husk powder are typically nut-free, but verify labels if severe allergies are a concern.
Can I substitute applesauce with something else?
Try mashed banana (for a slightly sweeter loaf) or silken tofu (for a neutral flavor). For egg-free binding, flax eggs (1 tbsp ground flaxseed + 3 tbsp water per egg) work too, though texture may vary slightly. Adjust other liquids if needed to maintain dough consistency.
What's the best way to test if my bread is fully baked?
Use the internal temperature method: the bread is done when it reaches 190-200°F at the center. You can also tap the bottom—it should sound hollow. For visual confirmation, the crust should be deep golden brown. If unsure, bake 5 more minutes to prevent gummy centers.