
Side Dishes
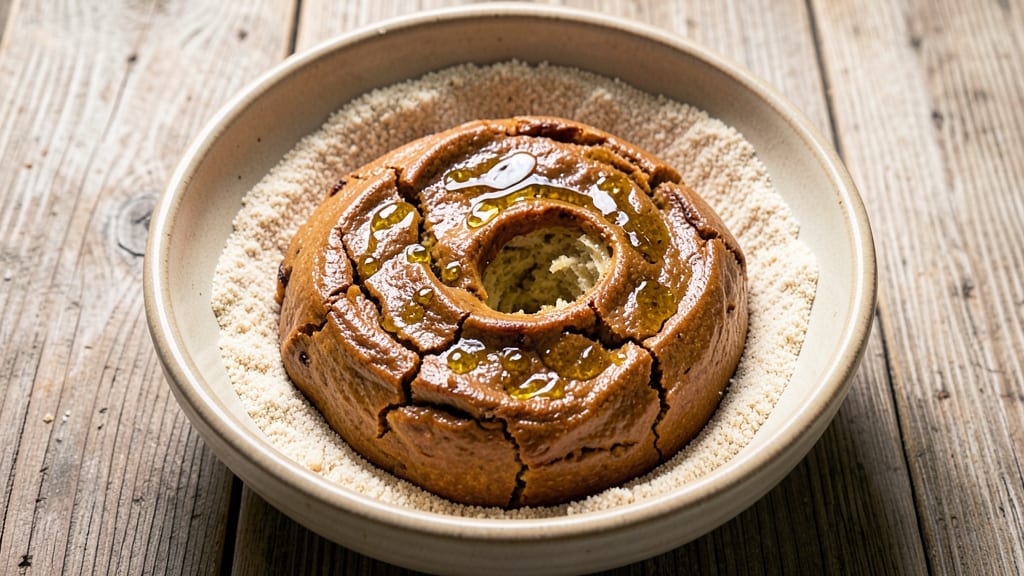
This almost no-knead bread recipe transforms simple pantry staples into artisan-quality loaves with minimal effort. The secret lies in overnight fermentation, which develops deep flavor and that coveted open crumb structure without requiring any kneading expertise.
I've baked hundreds of loaves using this method, and it consistently delivers restaurant-worthy results with just a few ingredients and patience.
The process couldn't be simpler: mix flour, water, yeast, and salt in a bowl, let it ferment overnight, then shape and bake. What makes this recipe special is how the long fermentation time creates complex flavors and a light, airy crumb while developing a beautifully crisp crust.
No fancy equipment needed—just a mixing bowl and your oven.
By the time you pull that golden-brown loaf from the oven, you'll have bread with a shatteringly crisp exterior and a soft, chewy interior that's perfect for dipping in olive oil or slathering with butter.
The aroma alone will have everyone asking for seconds. This is the kind of bread that makes homemade taste better than anything you can buy.
Perfect for feeding a crowd or enjoying with soups and stews, this recipe scales beautifully. The dough can be prepped the night before, making it ideal for busy schedules. Let's get started on creating your perfect loaf—no kneading required.
Ingredients for almost no knead bread
Four simple ingredients transform into restaurant-quality bread with just overnight patience.
| Ingredient | Amount | Notes |
|---|---|---|
| All-Purpose Flour 🌾 | 4 cups | Unbleached preferred for better flavor |
| Warm Water 💧 | 1 ½ cups | 110°F for optimal yeast activation |
| Active Dry Yeast 🍞 | ¼ tsp | Fresh yeast preferred but dry works |
| Kosher Salt 🧂 | 1 ½ tsp | Diamond Crystal preferred for accuracy |
| Olive Oil 🫒 | 1 tbsp | Extra-virgin for best flavor |
| Cornmeal 🌽 | ¼ cup | For dusting baking surface |
| Ice Water ❄️ | ½ cup | For shaping dough if needed |
The flour is everything here. King Arthur or Bob's Red Mill are my go-tos—they handle fermentation beautifully. If you're using store-brand flour, check the expiration date (yeast loves fresh flour). Warm water is key—too hot kills yeast, too cold slows fermentation. I always test mine by dipping my finger in; it should feel like bathwater. The yeast? Fresh is best, but if you're using dry, make sure it's active (drop in warm water with sugar—it should foam in 5-10 minutes). Salt is non-negotiable for flavor, but don't overdo it. The olive oil adds richness and helps with that perfect crust.
No yeast? Sourdough starter works too—use 1/4 cup activated starter instead of the yeast and water. Store-brand flour giving you doubts? Sift it first to remove any lumps that could ruin your dough. Olive oil shortage? Vegetable oil or melted butter works in a pinch, though the flavor won't be quite the same. Cornmeal substitute? Semolina or rice flour both work well. The ice water is your secret weapon for shaping—dip your hands in it while working with the dough to prevent sticking. Pro tip: if your dough feels too sticky, add flour 1 tbsp at a time until it's just manageable.
This dough is your overnight project—plan ahead! Once mixed, cover loosely with plastic wrap and let it ferment at room temperature for 12-18 hours. 18 hours gives maximum flavor, but 12 works in a pinch. After shaping, let it proof another 1-2 hours before baking. The shaped dough can be refrigerated for up to 24 hours if you need to delay baking. Baked loaves keep well wrapped at room temperature for 3 days or frozen for 3 months. For best results, reheat slices in a dry skillet or toaster.
Why You'll Love This Recipe
- Four-Hour Freedom: Mix it, cover it, forget it. That’s it. No standing over a counter, no punishing kneads—just stir in warm water, let the yeast do its magic, and wake up to bread that smells like a bakery. (Yes, even on a Tuesday night.)
- Crusty Yet Tender: The olive oil keeps it moist inside while the salt and yeast work together for that perfect snap. Honestly, the first time I bit into it, I thought, "Wait, I actually made this?"—and then I made it again.
- Leftovers That Shine: This bread stays fresh for days, so I bake one loaf and use it for toast, sandwiches, or even croutons. My kids fight over the ends, and I fight the urge to eat the whole thing myself.
- Pantry Staple Power: Five ingredients, zero specialty items. You’re not hunting for sourdough starter or exotic flours—just flour, water, yeast, salt, and a drizzle of oil. Budget-friendly? Absolutely. Reliable? Even more so.
Step-by-step instructions for crusty, open-crumbed no-knead bread
Here's how to transform simple ingredients into a bakery-style loaf with minimal effort.
Mix and Ferment the Dough Overnight
In a large bowl, combine the 4 cups all-purpose flour and 1.5 tsp kosher salt. Make a well in the center and add the 1.5 cups warm water (about 110°F), 0.25 tsp active dry yeast, and 1 tbsp olive oil. Using a wooden spoon, mix vigorously until no dry flour remains—about 2 minutes. The dough will be shaggy and sticky, which is perfect for this method.
Cover the bowl loosely with plastic wrap or a damp kitchen towel. Let the dough ferment at room temperature for 12-18 hours. You'll know it's ready when it's nearly doubled in size and has a slightly jiggly, airy appearance. This long fermentation develops deep flavor and that signature open crumb structure. I like to set my bowl in a warm spot, like near the oven with the light on, to encourage even fermentation.
Shape and Preheat for Baking
After fermentation, the dough will be very soft and sticky. Lightly flour a clean surface and gently scrape the dough onto it. Using wet hands, shape the dough into a round boule by pulling the edges toward the center and tucking them underneath. Don't worry if it's not perfect—this bread thrives on rustic imperfections. Place the shaped dough seam-side up on a baking sheet dusted with 0.25 cup cornmeal. Cover loosely and let it rest for 30 minutes at room temperature.
While the dough rests, preheat your oven to 450°F. Place a Dutch oven with lid in the oven to heat as well. The Dutch oven creates steam, which is crucial for developing that crispy crust and open crumb. If you don't have a Dutch oven, use a heavy oven-safe pot with a lid or cover the baking sheet with foil.
Bake with Steam for Maximum Crust
Carefully transfer the dough (still on its cornmeal-dusted baking sheet) into the preheated Dutch oven. Cover with the lid and bake for 30 minutes. After 30 minutes, remove the lid and continue baking for another 10-15 minutes until the bread is deep golden brown and sounds hollow when tapped on the bottom. The internal temperature should reach 205-210°F when measured with an instant-read thermometer.
Here's the thing—don't open the oven during the first 30 minutes. The steam is what creates that perfect crust and open crumb. If you peek too early, you'll lose steam and end up with a dense loaf instead of the airy texture you're after. The bread is done when it's beautifully browned and pulls away slightly from the sides of the Dutch oven.
Cool and Slice for Best Texture
Remove the bread from the Dutch oven and transfer it to a wire rack to cool completely. This is crucial—cutting into the bread too soon will make it gummy instead of crisp. Let it cool for at least 1 hour, though I prefer to wait 2 hours for the crumb to fully develop. You'll notice the bread will sound hollow when tapped on the bottom as it cools, which is a good sign of proper baking.
Once cooled, slice the bread with a sharp serrated knife. The interior should reveal an open, airy crumb with large, irregular holes—this is what makes no-knead bread so special. Store any leftovers wrapped in a cloth bag at room temperature for up to 3 days, or freeze slices for up to 3 months. The flavor actually improves as it stales slightly, making it perfect for toast or French toast.
Pro Tips For Making Almost No Knead Bread
- Use a thermometer for water: I learned this the hard way—yeast is picky. Warm water should hit 105–110°F (40–43°C), not just "hot to the touch." Too hot and it kills the yeast; too cool and it won’t activate. A cheap thermometer solves guesswork.
- Stretch, don’t fold, the dough: After the first rise, resist the urge to punch it down like a normal dough. Instead, gently stretch the sides toward the center—this builds structure without overworking it. Overfolding deflates the gluten and makes the bread dense.
- Salt the water, not the flour: I used to add all the salt to the flour mix, and the crust always tasted uneven. Dissolve the kosher salt in the warm water first—this ensures even distribution and a more consistent flavor throughout. Trust me, your taste buds will notice.
- Let it rise until it’s almost ready: The dough will look slack when it’s done rising, but if you wait until it’s just overproofed, you’ll regret it. It should rise until it’s about 50% larger—not until it’s doubled or domed. Overproofed bread collapses like a sad soufflé.
Troubleshooting great almost no knead bread
Dense Dough Issues
If your dough turns out too dense after baking, it’s likely due to insufficient fermentation time or improper shaping. The dough needs 12-18 hours of fermentation to develop that signature open crumb.
If you’re short on time, try fermenting it in the fridge for 24-48 hours—the cold slows yeast activity but enhances flavor. Also, avoid over-handling the dough when shaping; wet your hands and work gently to maintain structure. 🌟
Flat or Underbaked Bread
A flat loaf usually means the oven wasn’t hot enough or the dough didn’t proof long enough. Preheat your oven to 450°F and let the Dutch oven heat up alongside the dough. If your bread still looks flat, try increasing the proofing time by 30-60 minutes before baking.
For extra insurance, place a tray of boiling water in the oven when you start baking to boost steam. The bread should spring back slightly when gently pressed.
Gummy or Chewy Interior
This happens when the bread is sliced too soon or didn’t bake long enough. Always let the bread cool completely on a wire rack for at least 1 hour (2 hours is ideal). If the interior feels gummy, it likely didn’t reach the proper internal temperature of 205-210°F.
Next time, bake for an additional 5-10 minutes uncovered until the crust is deep golden brown and the bread sounds hollow when tapped.
Pale or Soft Crust
A pale crust often means the bread didn’t get enough steam during baking. The Dutch oven is key here—if you don’t have one, cover the baking sheet with foil or use a baking stone. For extra crispiness, sprinkle coarse cornmeal or semolina on the dough before baking.
If your crust is still soft, try increasing the oven temperature to 475°F for the last 10 minutes of baking to help it set properly.
Dough Sticking to Bowl
If your dough clings stubbornly to the mixing bowl, it’s likely too wet or the flour wasn’t mixed enough. The dough should be shaggy but not soupy—if it’s too sticky, add 1 tablespoon of flour at a time until it’s just manageable.
For easier cleanup, use a bowl that’s slightly larger than your dough and spray it lightly with olive oil before mixing. After fermentation, use a well-floured surface and wet hands to scrape the dough out without tearing it.
Nutrition facts
Frequently asked questions
Why does this bread need overnight fermentation?
The overnight fermentation is what creates that signature open crumb and deep flavor. The slow rise allows the yeast to break down the gluten gently, producing a light, airy texture without any kneading. It also develops complex flavors that you just can't get with quick-rise methods. Think of it as letting the dough "rest" and develop character—like a fine wine!
Can I make this bread without a Dutch oven?
If you don't have a Dutch oven, use a heavy oven-safe pot with a lid or cover your baking sheet with foil. For even better results, place a tray of boiling water in the oven when you start baking to create steam. The key is maintaining moisture during the initial baking phase to develop that crisp crust and open crumb.
How do I know when the dough is ready to bake?
The dough is ready when it's nearly doubled in size and has a slightly jiggly, airy appearance. Gently press your finger into the dough—if it springs back slowly (not immediately), it's ready. The surface should also look slightly puffy and have small bubbles forming. If you're unsure, let it ferment a little longer rather than risking under-proofing.
What if my dough doesn't rise overnight?
Cold temperatures can slow yeast activity. Try moving your dough to a warmer spot, like near the oven with the light on. If it still doesn't rise, check your yeast—it might be old. For future batches, use fresh yeast or try fermenting in the fridge for 24-48 hours (the cold slows fermentation but enhances flavor). Always use warm water (110°F) to activate the yeast initially.
How should I store leftover bread?
Wrap cooled bread in a cloth bag or paper towel to prevent sogginess. Store at room temperature for up to 3 days or freeze slices for 3 months. The flavor actually improves slightly as it stales—perfect for toast or French toast! For extra freshness, reheat slices in a dry skillet or toaster until crispy.