
Side Dishes
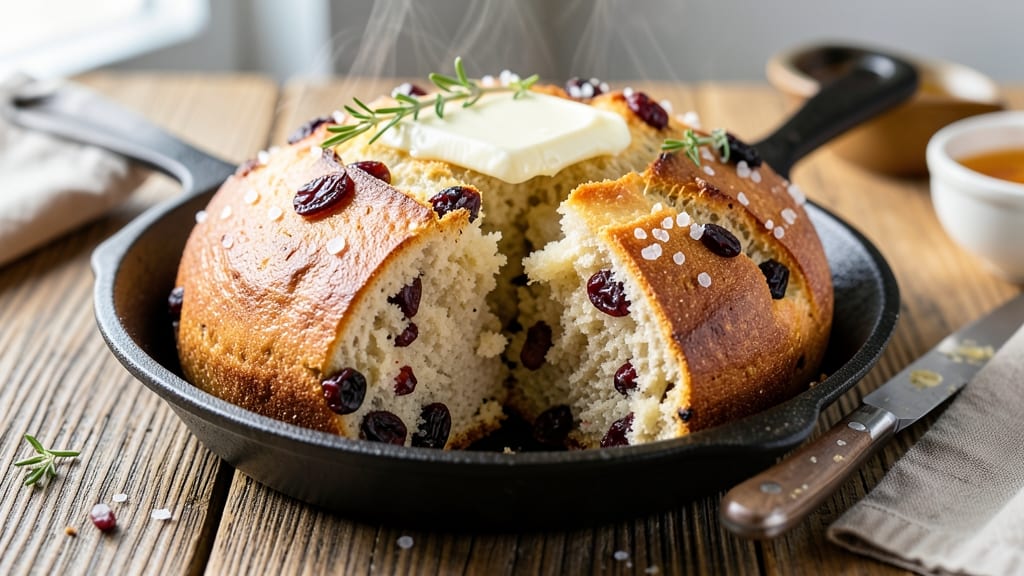
This American soda bread recipe delivers rustic, tangy loaves with a crisp crust and tender crumb—all without yeast. 💛 The secret lies in buttermilk's natural acidity activating baking soda for a perfect rise, creating that signature texture that's been a staple in American kitchens for generations.
No kneading, no waiting for yeast to proof—just mix, shape, and bake.
The beauty of traditional soda bread is its simplicity: just flour, baking soda, buttermilk, and salt. But don't let the short ingredient list fool you—this bread develops deep, complex flavors as it bakes, with a slightly tangy taste from the buttermilk.
The crust gets beautifully golden and crisp, while the interior stays soft and slightly dense, perfect for soaking up soups or slathering with butter.
What makes this recipe special is its foolproof nature—ideal for beginners or busy cooks. The dough comes together in minutes, and the baking time is just 40 minutes at 425°F, making it a perfect side for hearty meals.
Whether you stick to the classic version or add raisins, seeds, or herbs, the result is always satisfyingly rustic and comforting.
Once you try homemade soda bread, you'll never go back to store-bought. The aroma alone fills your kitchen with warmth, and every slice tastes like a piece of American baking tradition. Let's get started on this timeless recipe that's as much about heritage as it is about deliciousness.
Ingredients for american soda bread
Four core ingredients plus optional extras—this is the classic American soda bread lineup.
| Ingredient | Amount | Notes |
|---|---|---|
| All-Purpose Flour 🌾 | 3 ½ cups | Unbleached preferred for best texture |
| Baking Soda 🧂 | 1 tbsp | Freshly opened for maximum lift |
| Buttermilk 🥛 | 1 ½ cups | Full-fat for tangy flavor |
| Salt 🧂 | 1 tsp | Kosher or sea salt preferred |
| Unsalted Butter 🧈 | ½ cup | Cold, cubed for texture |
| Raisins 🍇 | ½ cup | Optional, soaked in warm water |
| Fresh Rosemary 🌿 | 1 tbsp | Finely chopped, optional |
| Sesame Seeds 🌰 | 2 tbsp | For crunchy topping |
| Poppy Seeds 🌱 | 1 tbsp | Optional, for nutty flavor |
| Cornmeal 🌽 | ¼ cup | For dusting baking sheet |
The flour is your foundation, so grab unbleached all-purpose for that signature tender crumb. King Arthur or Gold Medal are my go-tos—they bake up reliably. Baking soda? Check the expiration date—old stuff loses its lift. Buttermilk's the magic—full-fat gives the best tang, but low-fat works too. If you don't have it, mix 1 tbsp vinegar or lemon juice into 1.5 cups milk and let sit 5 minutes. The butter? Cold cubes create those delicious pockets in the bread. Skip the melted version unless you want a denser loaf.
No raisins? No problem—dried cranberries or chopped dates work beautifully. Fresh rosemary adds depth, but dried at half the amount gets you close. Sesame seeds and poppy seeds? Toast them 2 minutes in a dry pan before sprinkling for extra flavor. Short on seeds? Everything bagel seasoning makes a fantastic substitute. The cornmeal isn't just for dusting—it creates that crispy crust. Don't skip it if you want that authentic soda bread texture. And if you're feeling adventurous, try 1 tbsp honey in the dough for subtle sweetness.
This dough keeps 24 hours in the fridge if you want to prep ahead—just shape and refrigerate. For best results, bake within 4 hours of mixing. The bread reheats beautifully—wrap in foil and warm 10 minutes at 300°F to revive the crust. Leftovers? Toast slices for crispy sandwiches or freeze for 3 months in a sealed bag. Pro tip: Slice with a serrated knife while still warm for cleaner cuts. The aroma alone makes your whole kitchen smell like a bakery—worth every minute!
Why You'll Love This Recipe
- No-Fuss Mixing: The dough comes together in three minutes—just dump, stir, and shape. No kneading, no waiting, no stress. That baking soda magic does all the work while you sip your coffee.
- Tangy Butter Magic: That buttermilk cut with cold butter? It delivers a tender crumb with just enough tang to make every bite feel like a hug. (Yes, even on a Tuesday night.)
- Everyday Hero: Slice it for toast, cube it in soups, or serve it warm with jam—this bread handles everything. My kids fight over the leftovers, and I don’t blame them.
- Pantry Staple Power: Five ingredients, zero specialty items. If you’ve got flour and butter, you’ve got a loaf. And it keeps for days, so you’re never scrambling for a side.
Step-by-step instructions for American soda bread
Here's the method that delivers a perfectly tangy, crusty loaf every single time.
👨🍳 Step 1: Mix the Wet Ingredients and Soak the Raisins
In a large mixing bowl, whisk together the 1.5 cups buttermilk, 1 tbsp baking soda, and 1 tsp salt until fully combined. You'll notice it immediately start to bubble slightly—this chemical reaction is what creates that signature soda bread tang. Let this mixture sit for 5 minutes while you prepare the other ingredients.
While waiting, drain and rinse the 0.5 cup raisins if using, then place them in a small bowl. Pour 2 tablespoons hot water over them and let soak for 10 minutes. This plumps them up and ensures they stay juicy during baking. If you're skipping raisins, simply skip this step—your bread will still be delicious.
👨🍳 Step 2: Cut in the Butter and Combine with Dry Ingredients
Add the 0.5 cup cold unsalted butter, cut into small cubes, to the buttermilk mixture. Using a pastry cutter or your fingers, work the butter into the wet ingredients until you have pea-sized pieces throughout. This cold butter creates those beautiful flaky layers in your finished loaf.
In a separate bowl, whisk together the 3.5 cups all-purpose flour and 1 tbsp finely chopped fresh rosemary (if using). Gradually add this dry mixture to the wet ingredients, stirring just until combined. The dough will be sticky—this is normal! Don't overmix or you'll develop gluten and end up with a tough loaf.
🥘 Step 3: Shape and Prepare for Baking
Lightly flour a clean surface and turn out the dough. Gently shape it into a round loaf about 8 inches in diameter. Place it on a baking sheet dusted with 0.25 cup cornmeal—this prevents sticking and adds a lovely crunchy texture to the bottom crust.
Make a deep cross on top of the loaf using a sharp knife, cutting almost to the bottom. This classic design not only looks beautiful but also helps the bread expand evenly as it bakes. Sprinkle the top with 2 tbsp sesame seeds and 1 tbsp poppy seeds for that signature crunchy finish.
🔥 Step 4: Bake Until Golden and Hollow-Sounding
Preheat your oven to 425°F with a rack positioned in the lower third. Bake the loaf for 30-35 minutes until the top is deep golden brown and a toothpick inserted in the center comes out clean. The bread is done when it sounds hollow when tapped on the bottom.
I like to bake soda bread on the lower rack—this creates that perfect crispy bottom crust while keeping the top tender. If your oven runs hot, start checking at the 25-minute mark to prevent overbrowning. Let the bread cool on a wire rack for at least 15 minutes before slicing—this ensures clean cuts and prevents a gummy interior.
Pro Tips For Making American Soda Bread
- Mix Butter Into Flour First: I learned this the hard way—adding cold butter cubes to wet ingredients makes for a gummy mess. Cut the butter into the flour first until it resembles coarse crumbs, then pour in the buttermilk. The dough will handle better and the crumb will be lighter.
- Use Room-Temperature Buttermilk: Cold buttermilk makes the dough fight you, and warm buttermilk can kill the baking soda’s lift. Let it sit out for 30-60 minutes until it’s just above fridge temp (about 60°F). The bread will rise faster and taller.
- Don’t Overmix the Dough: This isn’t a cake—you’re not trying to develop gluten. Stir just until combined, then fold in the butter-flour mix. Overworking it turns the bread dense and chewy. Two turns with a spatula is all you need.
- Score Deeply Before Baking: A shallow slash won’t do—cut the dough ½-inch deep in an X or crosshatch. This lets steam escape properly, preventing a dense center and giving you that classic rustic crack. Use a sharp knife or lame for clean lines.
Make-ahead tips for this dish
Dough Prep Ahead
Mix your dough up to 24 hours in advance and store it in an airtight container in the fridge. The flavors deepen overnight, and the buttermilk's tang intensifies, giving you a more complex loaf.
I like to shape it into a ball, cover it with a damp towel, and let it rest on the counter for 10 minutes before refrigerating. This prevents the dough from sticking to the container.
Shape and Freeze
For ultimate convenience, shape your loaf, wrap it tightly in plastic wrap, then place it in a freezer bag for up to 3 months. When ready to bake, thaw it in the fridge overnight, then bake as directed.
The texture remains just as tender—no freezer burn or dryness. I've even baked it straight from frozen by adding 5-10 extra minutes to the baking time.
Bake from Frozen
If you're in a hurry, you can bake your shaped loaf straight from the freezer! Place it on a parchment-lined baking sheet, sprinkle with seeds, and bake at 425°F for 40-45 minutes until golden and hollow-sounding.
The crust will be slightly thicker, but the interior stays moist. This is my go-to method for Sunday morning breakfasts when I want fresh bread without the overnight wait.
Reheat for Freshness
To revive stale slices, wrap them in aluminum foil and warm at 300°F for 10 minutes. For extra crispiness, place the foil-wrapped bread directly on the oven rack.
I also love toasting slices in a butter-coated skillet over medium heat for 2-3 minutes per side—this brings back that bakery-fresh crunch. 🔥
Storage Hacks
Keep your loaf in a brown paper bag at room temperature for up to 3 days—this mimics a bakery environment and prevents drying. For longer storage, slice the bread and freeze individual portions on a tray before transferring to a bag.
This prevents soggy slices when you're ready to toast them. I always keep a few slices frozen for quick grilled cheese sandwiches or French toast mornings.
Batch Baking
Double the recipe and bake two loaves at once! Use two baking sheets and swap their positions halfway through baking for even browning. Once cooled, wrap both loaves in plastic wrap and store them side by side in a large airtight container.
This keeps them fresh for 5-6 days—perfect for meal prep. I often bake a double batch on Saturday nights so I have bread ready for the week ahead. 💛
Nutrition facts
Frequently asked questions
Can I substitute buttermilk in this recipe?
Yes! If you don't have buttermilk, mix 1 tbsp vinegar or lemon juice into 1.5 cups milk and let it sit for 5 minutes to curdle. This mimics the acidity that activates the baking soda for that signature tang. For extra richness, use whole milk instead of skim.
Why did my soda bread turn out dense instead of light?
Overmixing develops gluten, making the bread tough. Stir just until combined—sticky dough is normal! Also, ensure your baking soda is fresh (old soda loses lift) and use cold butter for proper layering. Let the dough rest 5 minutes after mixing to relax the gluten.
How can I make this bread sweeter?
Add 1-2 tbsp honey or sugar to the wet ingredients for subtle sweetness. For a dessert version, fold in ½ cup dried fruit (like cranberries) or sprinkle cinnamon-sugar on top before baking. The buttermilk's tang balances sweetness beautifully.
Can I bake this in a Dutch oven for a crustier loaf?
Shape the dough into a round, place it in a preheated Dutch oven with ½ cup water on the bottom, cover, and bake at 425°F for 30 minutes. Remove the lid and bake 10-15 more minutes for a crispy crust. This mimics artisanal bread techniques while keeping the interior tender.
What's the best way to serve leftover soda bread?
Toast slices for crispy sandwiches or French toast! Warm in a 300°F oven for 10 minutes wrapped in foil, or pan-fry with butter for a bakery-style finish. It's also perfect for soup dippers or crumbled over salads for texture.