
Side Dishes
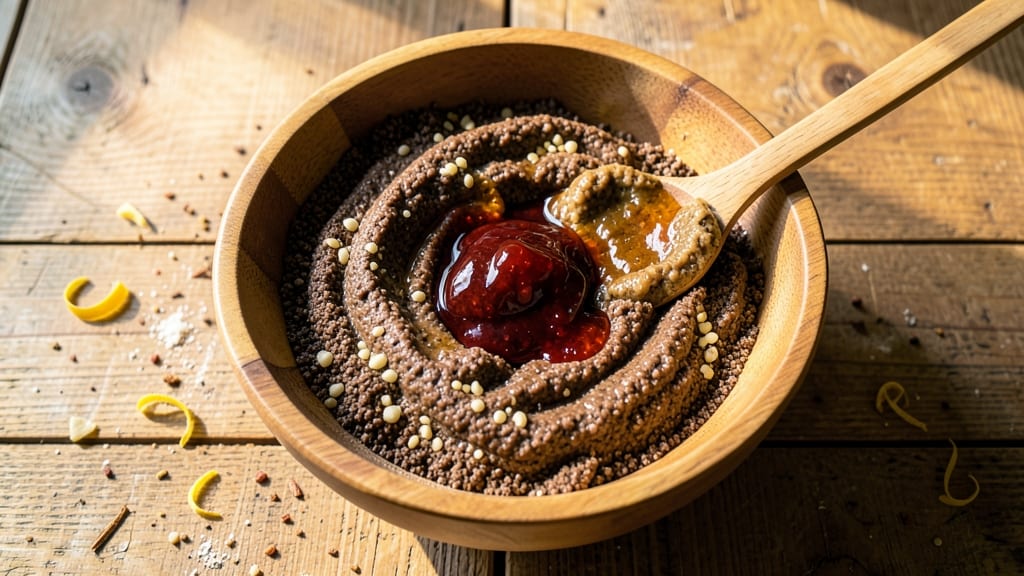
Austrian rye bread delivers that signature dense crumb and deep molasses flavor that makes it a staple in Central European bakeries. This recipe captures the essence of traditional Austrian baking, where a long fermentation and precise hydration create the perfect balance of tangy sourness and sweet caramelized crust. The secret lies in the combination of dark rye flour and molasses, which develop complex flavors during the slow rise.
What sets this recipe apart is the two-stage fermentation—first a long autolyse to hydrate the dough properly, then a slow bulk fermentation that builds depth of flavor.
The dough is shaped into a classic round loaf and baked until the crust achieves that satisfying crusty crunch while maintaining a tender interior. This method ensures every slice has that characteristic dense yet moist texture that rye bread lovers crave.
The result is a loaf with a rich, dark crust that gives way to a dense, slightly sticky crumb with pockets of air and subtle molasses sweetness.
The aroma alone will fill your kitchen with the comforting scent of freshly baked rye, while the flavor profile balances earthy rye with the caramel notes of molasses. This bread pairs perfectly with hearty soups, cold cuts, or simply buttered and enjoyed on its own.
For those who prefer variations, you can add seeds like flax or sesame for texture, or adjust the molasses level to suit your taste. The beauty of this recipe lies in its adaptability while maintaining the core characteristics that define authentic Austrian rye bread.
Let's get started on creating this timeless loaf in your own kitchen.
Ingredients for austrian rye bread
Dark rye flour, molasses, and a slow fermentation create this Austrian classic's signature dense crumb and rich flavor.
| Ingredient | Amount | Notes |
|---|---|---|
| Dark Rye Flour 🌾 | 3 cups | High-extraction for deep flavor |
| All-Purpose Flour 🌾 | 1 cup | For structure and lift |
| Active Dry Yeast 🍞 | ¼ oz | Or 2.25 tsp (1 packet) |
| Molasses 🍯 | ½ cup | Unsulfured for authentic depth |
| Water 💧 | 1 ½ cups | Lukewarm (105°F) |
| Honey 🍯 | 1 tbsp | For yeast activation |
| Salt 🧂 | 1 ½ tsp | Diamond Crystal preferred |
| Sour Dough Starter 🍞 | ½ cup | Active, bubbly starter |
| Cornmeal 🌽 | ¼ cup | For dusting baking sheet |
| Ice Water ❄️ | ½ cup | For shaping and crust |
| Sesame Seeds 🌻 | 1 tbsp | Optional for texture |
| Flaxseeds 🌾 | 1 tbsp | Optional for crunch |
The dark rye flour is non-negotiable here—King Arthur or Bob's Red Mill are my go-tos, but any high-extraction rye will work. Look for a deep, almost chocolatey color in the flour, which indicates higher bran content and more complex flavor. Molasses is equally important: unsulfured is key for authentic depth. If you can't find it, sulfured molasses will work but lacks that traditional caramelized sweetness. For the yeast, active dry yeast is standard, but instant yeast can be used directly in the flour—just skip the honey activation step. The sour dough starter adds tanginess, so if you don't have one, a small amount of buttermilk or plain yogurt can mimic it, though it won't be as authentic.
No dark rye flour? Substitute with pumpernickel flour or a mix of whole wheat and rye, though the texture will differ slightly. Molasses too strong? Cut it with maple syrup at a 1:1 ratio—it won't be identical, but it softens the intensity. For the starter, if you're in a pinch, 1 tsp vinegar plus 1 tsp sugar can stand in for the tang. Sesame or flaxseeds are optional but add beautiful texture—toast them lightly in a dry pan before sprinkling for extra flavor. The cornmeal is just for dusting; if you're out, semolina or all-purpose flour works fine. And yes, you can skip the optional seeds entirely if you prefer a cleaner crust.
This dough is all about patience. After the initial autolyse, it needs 12-18 hours at room temperature for bulk fermentation—don't rush it. Shape the loaf gently, then chill it for at least 2 hours before baking to prevent spreading. The crust develops best when baked at 375°F for 45-50 minutes, but keep an eye on it—it should be deep brown with a satisfying crack. Store wrapped in a clean kitchen towel at room temperature for 3-4 days, or freeze slices for up to 3 months. The flavor actually improves over time, so make a double batch if you can.
Why You'll Love This Recipe
- No-Knead Magic: The dough comes together in minutes—just mix, let it rest, and bake. Honestly, the only "work" is waiting, and that’s the best part when the house smells like warm molasses and rye.
- Deep, Rich Soul: That molasses? It’s the secret weapon—caramel notes that linger with every bite. Between us, it’s the kind of bread that makes you slow down and savor, even at breakfast.
- Weeknight Workhorse: Slice it for sandwiches, toast it for breakfast, or freeze half for when life gets busy. I’ve used it for everything from open-faced dinners to crumbled into soups—it’s my go-to for lazy nights.
- Budget Bread Wins: Uses pantry staples and stretches far—dark rye flour adds heft without costing a fortune. Plus, a single loaf feeds my family for days, with zero waste if you repurpose the ends.
Step-by-step instructions for Austrian rye bread
Here's how to craft this artisanal loaf with perfect molasses depth and a satisfying crunch.
Mix the Dough and Ferment Overnight
In a large mixing bowl, combine the 3 cups Dark Rye Flour, 1 cup All-Purpose Flour, 1.5 tsp Salt, and 0.25 oz Active Dry Yeast. Make a well in the center and add the 0.5 cup Molasses, 1 tbsp Honey, 1.5 cups Lukewarm (105°F) Water, and 0.5 cup Sour Dough Starter. Mix vigorously with a wooden spoon until a shaggy dough forms.
Cover the bowl with a damp kitchen towel and let it rest at room temperature for 30 minutes. This initial hydration allows the flours to fully absorb the liquid and activates the yeast. After resting, knead the dough on a lightly floured surface for 5-7 minutes until smooth and elastic. The dough will be sticky—this is normal due to the high rye content. Return it to the bowl, cover again, and refrigerate overnight (at least 12 hours). The cold fermentation develops complex flavors and improves texture.
Shape and Proof the Dough
Remove the dough from the refrigerator and let it sit at room temperature for 1-2 hours until pliable. Divide it into 4 equal portions (about 12 oz each) and shape each into a smooth, round boule. To do this, cup your hands over the dough, press gently to form a taut surface, then roll it between your palms while lifting to tighten the dough from the center outward.
Place the shaped boules on a baking sheet dusted with 0.25 cup Cornmeal, cover with a damp towel, and let them proof at room temperature for 1-2 hours until they've increased in size by about 50%. You'll know they're ready when they spring back slowly when gently pressed—this indicates proper fermentation. Preheat your oven to 425°F while the dough proofs.
Score and Bake for Crusty Perfection
Carefully transfer the proofed boules to a parchment-lined baking sheet. Using a sharp razor blade or serrated knife, score each boule with a deep crosshatch pattern—this controls expansion and creates that signature crusty texture. Brush the tops lightly with 0.5 cup Ice Water to encourage browning.
Bake the boules for 25-30 minutes until they're deep golden brown and sound hollow when tapped on the bottom. Rotate the baking sheet halfway through for even browning. The internal temperature should reach 190-200°F at the center. For extra crunch, sprinkle 1 tbsp Sesame Seeds and 1 tbsp Flaxseeds on top during the last 5 minutes of baking.
Cool and Enjoy
Remove the bread from the oven and transfer to a wire rack to cool completely. This can take 1-2 hours—resist the temptation to slice it warm, as the interior needs time to set properly. The bread will develop its full depth of flavor as it cools, with a dark, caramelized crust and a moist, slightly dense interior.
Slice with a serrated knife and serve with butter or your favorite jam. The molasses adds a rich sweetness that pairs beautifully with sharp cheeses or savory toppings. Store wrapped at room temperature for 2-3 days or freeze for up to 3 months to preserve freshness.
Pro Tips For Making Austrian Rye Bread
- WEIGH YOUR FLOURS: Dark rye flour is dense—don’t eyeball it. Use a kitchen scale for both the rye and all-purpose flour; 10% more rye than the recipe calls for gives that deep, chewy texture without drying out the dough. (Yes, even if your measuring cups say "level," they’re lying.)
- HYDRATE THE RYE FIRST: Mix the dark rye flour with water before adding the rest of the dough. Let it sit for 10 minutes—it’ll turn into a thick paste. This prevents a gummy, underdeveloped crumb later. (I learned this after kneading a dough that felt like glue.)
- DON’T OVERPROOF THE DOUGH: Rye bread ferments faster than wheat dough. Watch for bubbles and a 25% rise—no more. Overproofing turns your loaf into a sad, dense brick. If your kitchen’s warm, cut the proofing time by half.
- STEAM THE OVEN: Place a metal tray on the oven rack before preheating, then add 1 cup boiling water when loading the dough. The steam makes the crust crackle and the crumb open—no need for fancy Dutch ovens. (Your future self will curse you if you skip this.)
Pro cooking tips for this recipe
Autolyse Mastery
Start your dough with a 30-minute autolyse—this resting period after mixing lets the flours absorb liquid fully before kneading. For Austrian rye, I use lukewarm water (105°F) to activate yeast gently without shocking it.
The dough will feel sticky but cohesive, thanks to the high rye content. This step prevents gluten overdevelopment while ensuring even hydration throughout the dense crumb. 💧
Cold Fermentation Secrets
Refrigerate your dough overnight for 12-18 hours—this slow fermentation builds depth of flavor and improves texture. The cold slows yeast activity, allowing enzymes to break down starches into sugars that caramelize during baking.
I wrap my dough in plastic wrap to prevent drying, then place it in a large bowl to catch any leaks. The longer it ferments, the more complex the molasses flavor becomes.
Scoring for Crust Perfection
Use a sharp razor blade to score your boules in a deep crosshatch pattern before baking. This controls expansion and creates that signature crusty crunch. For extra drama, dip your blade in water first—it glides through the dough smoothly.
The scores should be about ½ inch deep to direct steam flow and prevent cracks. I find a 45-degree angle works best for even steam release during baking. ✨
Steam Boost Technique
Place a baking stone on the middle rack and preheat your oven to 425°F for at least 45 minutes. For extra steam, I place a metal bowl of boiling water on the lower rack during the first 10 minutes of baking.
This creates a crackly, caramelized crust while keeping the interior moist. Remove the water after 10 minutes and let the bread bake until deep golden brown.
Proofing Like a Pro
Your boules should increase by 50% during proofing—this takes 1-2 hours at room temperature. Test readiness by gently pressing the dough: it should spring back slowly (not immediately). If your kitchen is cold, proof near a pilot light or warm oven (turned off) to maintain consistent temperature.
I cover my dough with a damp towel to prevent drying while allowing it to rise properly.
Internal Temp Check
Bake until your bread reaches an internal temperature of 190-200°F—this ensures proper doneness without overbaking. Use an instant-read thermometer inserted into the center of a boule. The bread should sound hollow when tapped on the bottom.
For extra crunch, sprinkle sesame or flaxseeds in the last 5 minutes of baking. Let cool completely before slicing to preserve texture. 🌾
Nutrition facts
Frequently asked questions
Why does Austrian rye bread need such a long fermentation?
The extended 12-18 hour cold fermentation is key for developing that signature tangy depth. The slow process allows enzymes to break down starches into sugars, which caramelize during baking for that rich molasses flavor. It also improves texture by creating a more open, airy crumb while reducing bitterness from the rye flour.
Can I make this without a sour dough starter?
Yes! For a quick substitute, mix 1 tsp vinegar + 1 tsp sugar with the water to mimic the tang. Or use ½ cup buttermilk or plain yogurt instead of the starter. The flavor won't be identical, but it'll still give you that classic dense texture. The starter adds complexity, but this works in a pinch.
How do I prevent my rye bread from tasting too bitter?
Use high-quality, unsulfured molasses (never sulfured) and balance it with 1 tbsp honey in the recipe. The long fermentation also helps mellow bitterness. If your flour tastes bitter, try a blend of dark rye and all-purpose flour (like this recipe uses) to soften the flavor. Always store flour in a cool, dark place to preserve freshness.
Should I bake this in a Dutch oven?
While a Dutch oven works well for other breads, this recipe is designed for open baking to create that signature crispy crust. The ice water brushing and high heat (425°F) encourage caramelization. If you prefer a softer crust, reduce the temperature to 375°F and bake for 5-10 minutes longer, but expect less crunch.
How long can I keep this bread fresh?
Wrap the cooled loaf in a clean kitchen towel (not plastic) and store at room temperature for 3-4 days. The flavor actually improves as it stales! For longer storage, slice and freeze for up to 3 months. Toast frozen slices directly from the freezer for best results. The towel prevents mold while allowing moisture to escape slightly.